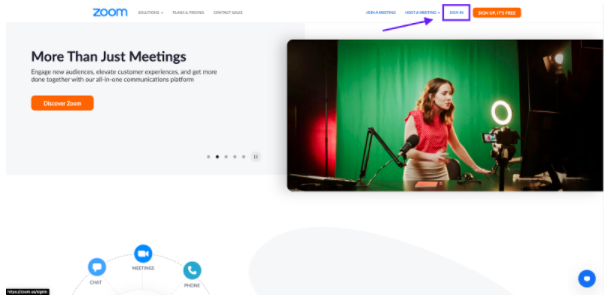
Zoom is pretty much everyone's best friend by now. Whether you're hosting an online workshop, meeting, or a podcast interview — it's the place to meet. But if you don't have the perfect backdrop at hand, you might be wondering how to add a photo, or video background? We've got you covered.

Why add Zoom background
Before we dive into the technicalities, we wanted to cover that even if you have a great setup or blank wall, choosing a virtual background might still make sense, the main reason being — branding.
Virtual backgrounds are a great way to consistently show up in your corporate colors and subtly let the viewers know which company you’re calling from or the personal brand you represent. You can do that by either adding a photo, graphic, or video. We’ll show you how below.
How to enable a virtual background in Zoom
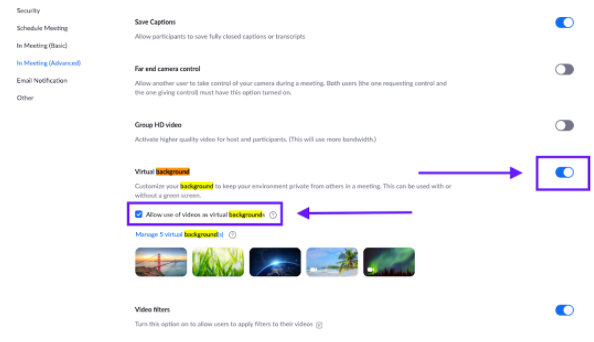
If you want to add a video or virtual photo background, first, you need to ensure that your settings will allow it. Go ahead and open up your account.
1. Go to Zoom and click on > Sign in.
2. Now go ahead and add your credentials to sign in.
3. Your personal dashboard will open up. On the left-hand side, go ahead and select > Settings.

4. Honestly, this part of Zoom is not so user-friendly; there’s a ton of settings to battle your way through. So do yourself a favor and simply use Command/Windows Key + F and type in ‚virtual background‘ to find the setting you are looking for.
5. Ensure the toggle next to this setting is set to ON, i.e. when it has turned blue. Below that, you also have the option to allow video backgrounds, which we also recommend checking, as we’ll walk you through how to add a video background below.
How to get the best virtual Zoom background
To get the best possible result for your virtual background, whether it’s a photo or a video, you should:
Use a physical green screen or plain colored background. If you have something like a picture or couch in the background, Zoom might pick it up, and you can see it appear through the virtual background as you move around in your call. To find out how to create a physical green screen, check out our article on how to use and make a green screen.
Wear a color that is in contrast with your physical background. If your outfit color is too close to your physical background, Zoom will have a hard time detecting whether you’re the person or the background. So make it easy for Zoom and wear something that’s in contrast.
Use a great source of lighting that lights you up equally. To get great lighting, you should have a light source in front of you. Whether that’s a window, lamp, ring light, or something else — you should try and have the lighting equal from both sides and avoid shadows on your face or body. Shadows might also cause the virtual background to leak into your visual. We recommed using a webcam with an integrated light.
How to change video background in Zoom
Alrighty, now that you’ve got everything set up, you can easily change the background of a Zoom call by using the preset templates Zoom gives you. Go ahead and:
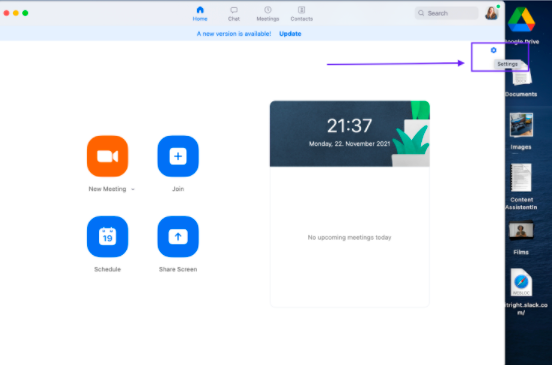
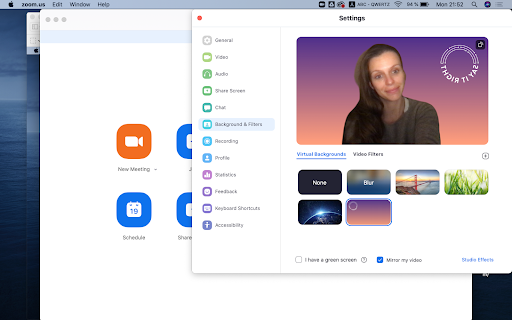
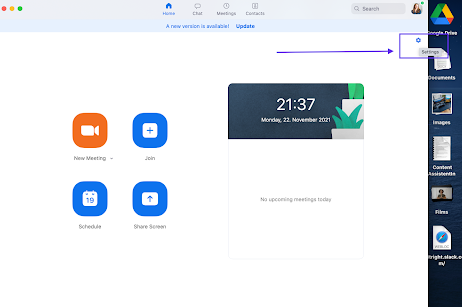
1. Open up Zoom on your desktop, and click on the settings icon in the top right-hand corner.
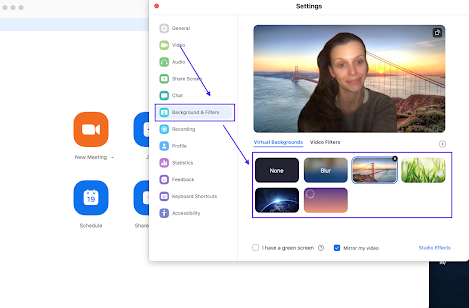
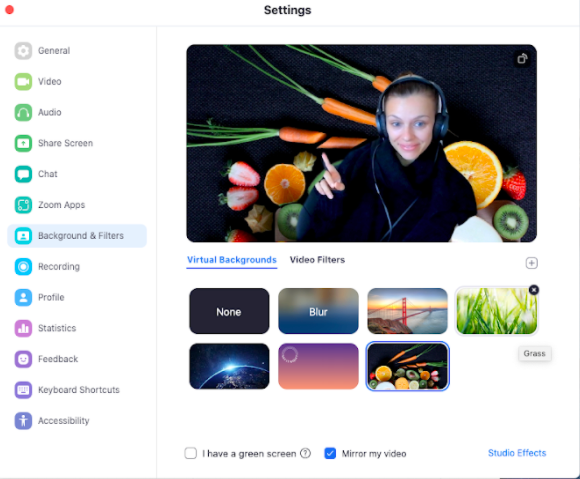
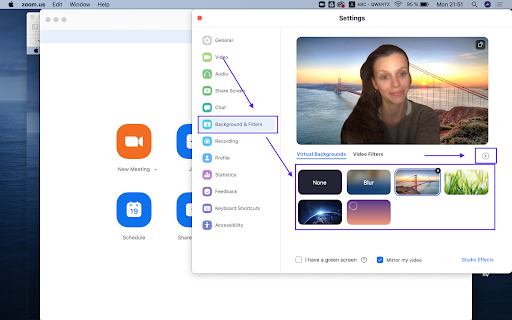
2. Now select > Background & Filters. Here you’ll have a preview window of what your Zoom video will look like once you have changed your background. Go ahead and click on one of the backgrounds Zoom has integrated to try it out. As you can see here, we decided to try out the Golden Gate Bridge, which is cute but also a bit random. We’ll cover how you can add a custom background to make things a bit more personal in the next step.
3. If you want to make things a bit more personal, you can upload your own Zoom background by clicking on the ‚+‘ icon above the backgrounds and uploading either a photo or a graphic design. We’ll go into detail below.

4. If you want to save one of these preset backgrounds, DON’T SKIP THIS STEP > log out of your Zoom account on your desktop and log back in again. Now your background setting will be applied to all of your meetings.
How to add a photo background to Zoom
Choosing a photo as your Zoom background is simple.
1. If you want to look for a photo to upload, hop on over to a website like Unsplash that has great royalty-free images, and they don’t cost a thing.
2. Now go ahead and type in the topic of your choice. We went ahead and typed in ‘healthy food,’ cause let’s say, for example, we’re a nutritionist hosting a workshop on switching to a healthy diet.
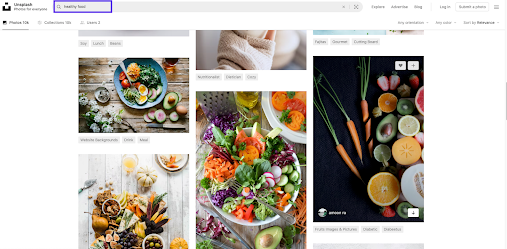
3. Be sure to pick a photo that has a contrasting background and isn’t too busy. The contrast will ensure people can see you clearly and the focus remains on you, while the not too cluttered background image makes sure the background has a professional look and feel. In this example, we chose the portrait photo with the black background and veggies in the foreground.
4. If you choose a portrait format like us, go ahead and make it landscape by opening it and clicking on the rotate icon — this works on both Mac and Windows. If your photo is already in landscape mode, ignore this step.
5. To make things easy, we recommend not worrying too much about the photo’s dimensions as long as it’s horizontal and a rectangle it should fit. You can always try it out and resize it to perfect dimensions later.
Voilà! It worked perfectly for us.
Suppose you’re not happy with how Zoom adapted the dimensions, no worries. You can resize your photo to fit perfectly. Simply open it up on your desktop again, and either Mac Preview or your Windows Photo Editor will open up. Zoom recommends dimensions in the ratio of your camera. If you’re unsure what those are, set a size of at least 1280 by 720 pixels.
How to add a branded background to Zoom video
You can also make a graphic background with your logo and brand colors like the one below.
If you’re not a graphic design pro and want a quick result, we recommend using Canva. It’s fast and easy and has everything you need. But, of course, you can also use more advanced tools like Photoshop and so on.
1. Go ahead and open up Canva.
2. Now go to the search bar and type in Zoom virtual background.
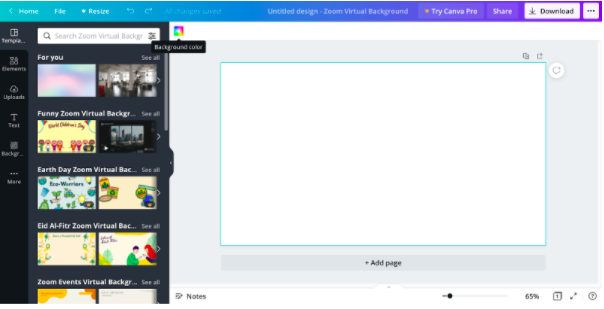
3. You’ll see a ton of virtual backgrounds pop up, and conveniently they’re all in the perfect format 1280 by 720 pixels. To create your own branded one, go ahead and select > Create a Blank Zoom Virtual Background.

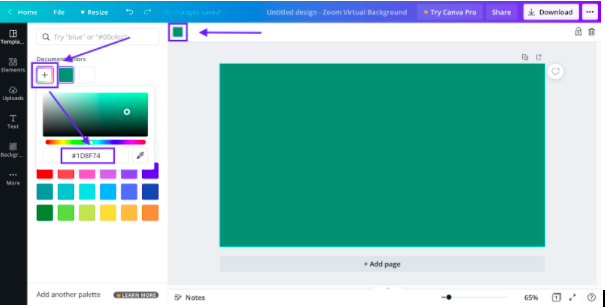
4. Now a blank canvas will open up, like this:
5. To change the background color, go ahead and click on the canvas and then click on the color icon above and to the left of the canvas. By clicking on the + icon, you can select a new color. A brand usually has predefined HEX colors > those are the ones with the # in front, as you can see below — add yours here.
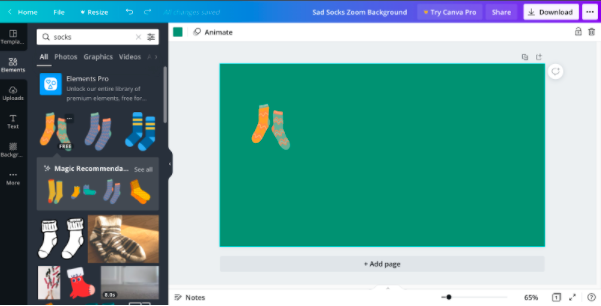
6. Now you can start adding a shape, perhaps, by clicking on > Elements in the left black toolbar. Here you can search for pretty much any shape. For example, we’re going to pretend that we have a brand called Sad socks. So, we searched for socks and clicked on the ones we liked; they will then appear on top of the background. You can resize this element by dragging the corners or move it around on the canvas by dragging and dropping it.
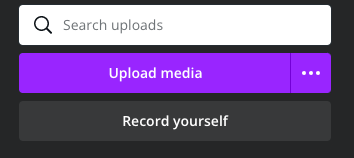
7. Now you’ll likely want to add a Logo to your background as well. Go ahead and do that by going to > Uploads and dragging and dropping your logo right into Canva in the left-hand sidebar, or by clicking on > Upload media.
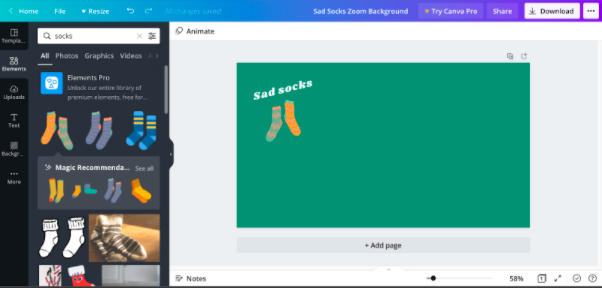
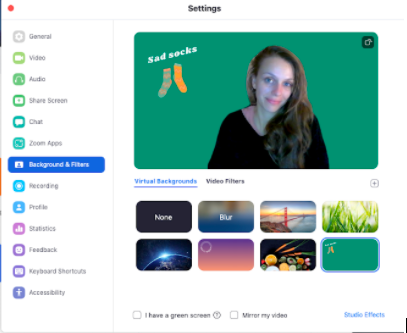
8. Your Logo should ideally have a transparent background to get the best result. Voilà! Here’s our version. we decided to place the Logo and icons in the left-hand corner so that there was enough space for the person presenting in the middle while at the same time drawing enough attention. We also flipped the icons to match the slant of the logo. So play around and see what works best for you.
9. Once you’re ready to try out your snazzy new background in Zoom, go ahead and press > Download and select a PNG or a JPG format.
10. You’re now ready to upload it to Zoom. Go ahead and open up your desktop app and select the settings in the top right-hand corner.
11. Now go to > Background & Filters and click on the + icon above the preset backgrounds.
12. Next, go ahead and upload the file you just downloaded from Canva — and that’s it! You’ll now see your branded video background. If you’re not 100% happy, you can always go back to Canva, switch up everything, and upload another one.
13. Once you’re happy, DON’T SKIP THIS STEP. You need to log out of your account and back in to ensure your awesome new background saves.
How to make a video your background in Zoom
We just covered the ins and outs of adding a photo or graphic background as your Zoom background — but what about video? Let’s dive into how you can add a background that has some movement and pizzazz in it as well.
Go ahead and open up the Zoom desktop app and head to Settings in the top right-hand corner of the interface.
A sidebar will open up, select > Background & Filters. Now you’ll see a preview window with some preset template backgrounds below it. Above these backgrounds, you will find a + button to the right, go ahead and click it.
Now go ahead and select a video. Then upload your video background and see what it will look like in calls in the preview. If you don’t have a video at hand, hop on over to Pexels and take your pick.
Once you’re happy, simply click out of the setting, your video background will be saved, but DON’T SKIP THIS STEP -> sign out of your desktop account and back in again.
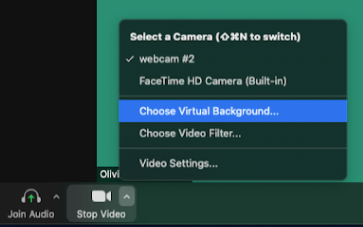
From now on, in every meeting, the video will be your virtual background unless you set it differently when you’re on a call. To do this, simply click on the arrow next to the video camera icon in the left-hand corner and go to > Choose Virtual Background. Here you can take your pick from your gallery of backgrounds or even select > None, if you want to keep things natural.
How to make a Zoom background video of yourself
So … this might just be the cheekiest part of this blog article. But since you’re here, we’re going to let you in on a sneaky idea — how to record yourself, add a virtual background, and upload it as a video background in Zoom. That way, you can actually pretend to be in a meeting when you’re not; this, of course, only works if you’re not meant to participate.
1. Open up a new Zoom meeting on your desktop app by clicking on > New Meeting. This will be a meeting with only you in it, now go ahead and get ready just to make minor movements and adjustments — pretend you are attending a meeting. Go ahead and hit record at the bottom of the screen.
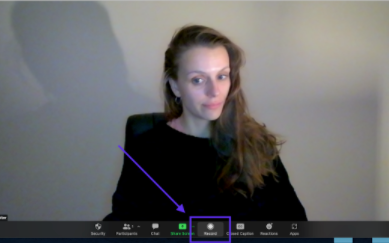
2. Select > Record on this computer and start gesturing.
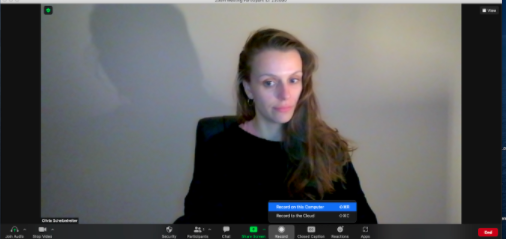
3. Record without Audio.
4. Once you’re gesturing, go ahead and click on stop on the bottom toolbar. End the meeting, and the video will be saved to your computer.
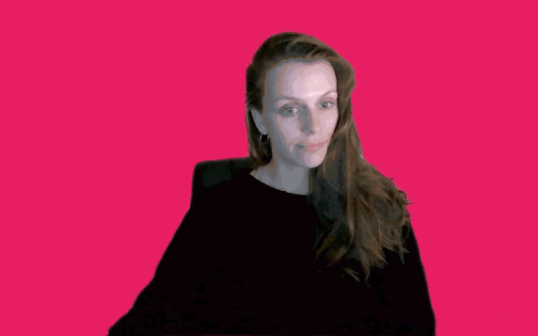
5. Now hop on over to Unscreen and drag and drop the video onto the website.
6. Within seconds the background of your video will be removed.
7. Now go ahead and click on > Change background. To change its color, click on the > Color tab. We went for a pink one. The colored background can distract others not to focus just on you — especially when the window is small, and you are one of 100 participants, nobody would notice the loop of your movements. If you download it as a GIF, it could look something like this:
8. But if you want higher quality, go ahead and download it as an mp4.
9. Then go back to the steps on how to add video background to Zoom above.
Neat trick, right? But don’t tell the parents we told you.
Comments
No comments so far.