GIFs are a great way to engage your readers; they’re fun, relatable, and grab people’s attention right away. But how fun would this be: knowing how to create a GIF of yourself?
That way, you can bring personality to something like a slide deck or emails. You can even switch out the background to match your branding. Or even strengthen your personal branding by creating a GIF that could go viral online.
Making a GIF of yourself might seem complicated, but we’re here to prove you wrong. We’re going to show you how you can get it done in no longer than 10 minutes, switch up the background, and even add a quote.
How to prep for creating a GIF of yourself
To create a GIF of yourself, you don’t really need a lot of things, mainly a camera.
But what you will want to do is brainstorm before you start making it. Think about what you want to portray or what message it should hold? The main categories of GIFs we find used around the internet and in marketing are:
-
Reaction GIFs: you use them basically when reacting to someone’s comment.


-
Statement GIFs: you're making a bold statement and are hoping to not only make an impact but that your audience might also go ahead and share it.
-
Hilarious GIFs: we all need a little more laughter in our lives; sometimes, the purpose of a GIF can simply be to make your audience LOL a little.

In our opinion, these are the best ways to use GIFs:
Social media posts & e-mail marketing: GIFs are a great way to grab people’s attention without having the hassle of creating a lengthy video. You can use them to underline a message you’re already talking about in your post or email.
Adding personality to slides: by adding yourself to slides like this genius teacher, you can have yourself pointing at something in your slides and keep the audience engaged.
Reactions on social media platforms or in forums: GIFs are a great shortcut to express your overall opinion and create a memorable way of communicating. So effective, people might even click on your profile to connect with you.
Birthday wishes
Grab a pen and paper and throw down a few ideas of what you’d like your GIF to be about; that will make the next steps a lot easier.
Equipment you need to create a GIF of yourself
To create a GIF, you need to take a video of yourself. You don’t need a heck of a lot to do this; the only thing you really need is a camera and perhaps some props, depending on what you want the GIF to be about.
The most basic setup:
Phone/camera
Tripod or something to fixate your phone
Props like clothes, hats, wooden spoons, whatever you think might be funny to grab. Our take on this: the more random, the better.

Choosing a background and planning to create a GIF of yourself
If you want the GIF to be in a particular setting, go ahead and choose that. But if you want to remove or change the background of the GIF in the aftermath, we recommend going for a plain background like a wall.
We also recommend opting for clothes and accessories of a different color than the wall. That way, if you want to remove or change the background in the aftermath using Unscreen, you will end up with a great result.
You will also want to make sure you are fully in the frame and that none of your body parts move out of the frame during the video shot. Below we’ll show you how to remove or change the background of your GIF.
Step by step: how to create a GIF of yourself
Now that you’re set up let’s start creating that GIF of yourself.
First, what you’re going to need is a 3-5 second video of yourself. So go ahead and open up the camera on your phone.
(Unless you have someone assisting you) You’re going to need to set up the timer to start filming. We recommend using the front-facing camera to keep an eye on yourself and whether you’re in the frame and what the video looks like. Go ahead and hit > Record and get into place.
Now do the movement you would like as a GIF just once. For the best result, it makes sense to end the movement where you started; this will create a smooth loop of your movement once you turn it into a GIF.
Now go ahead and stop recording.
Use your phone app to cut the video down to just the part where you do the movement; this should be a clean start and finish.
Now you can open up Unscreen to turn your video into a GIF. Depending on where you want to use the GIF next, you can do this either on your computer or your phone. But if you intend to use it for marketing materials, you will probably want to send it to your computer and go from there.
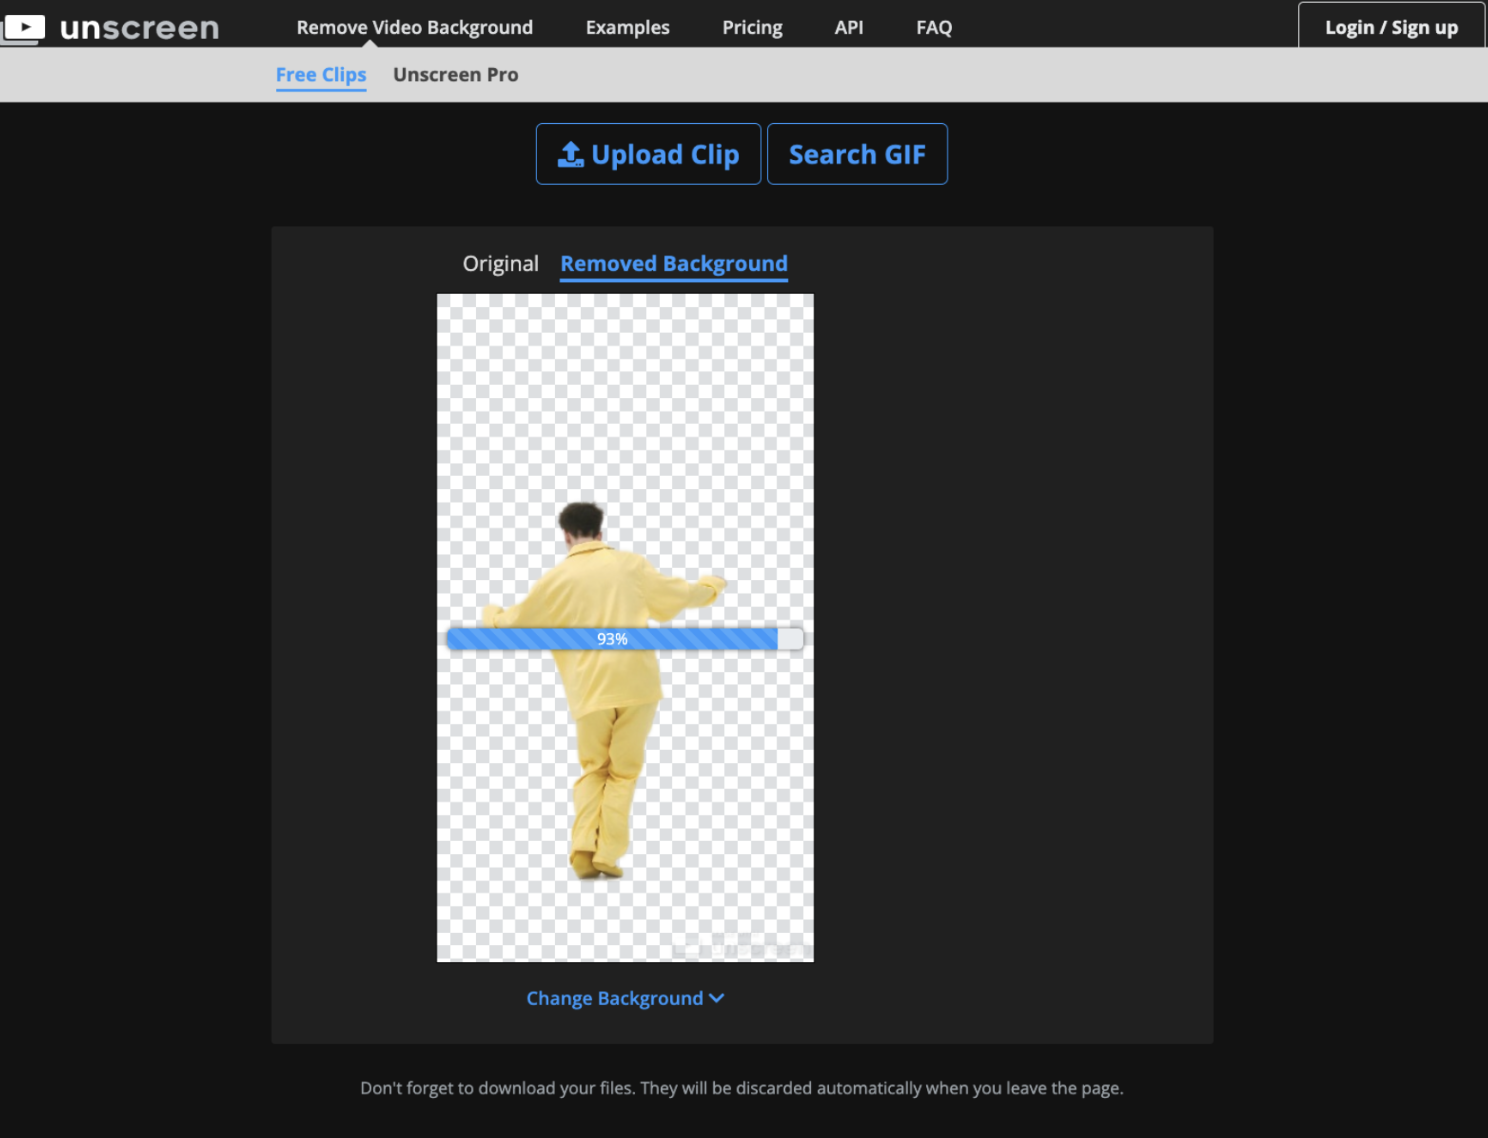
Now go ahead and drag and drop the video onto Unscreen.
-
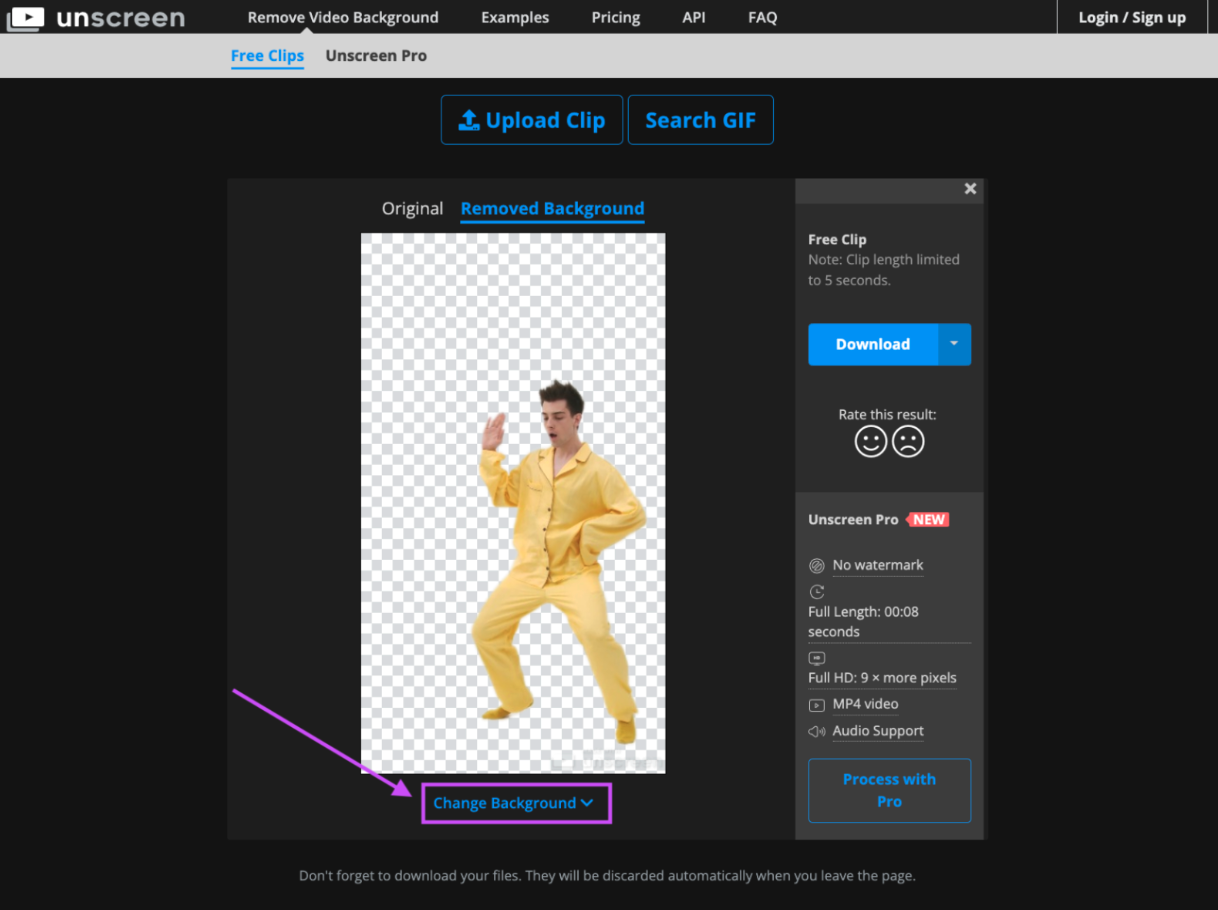
Unscreen will remove the background.
-
Now that the background has been removed, you can go ahead and click on > Change Background below the image.
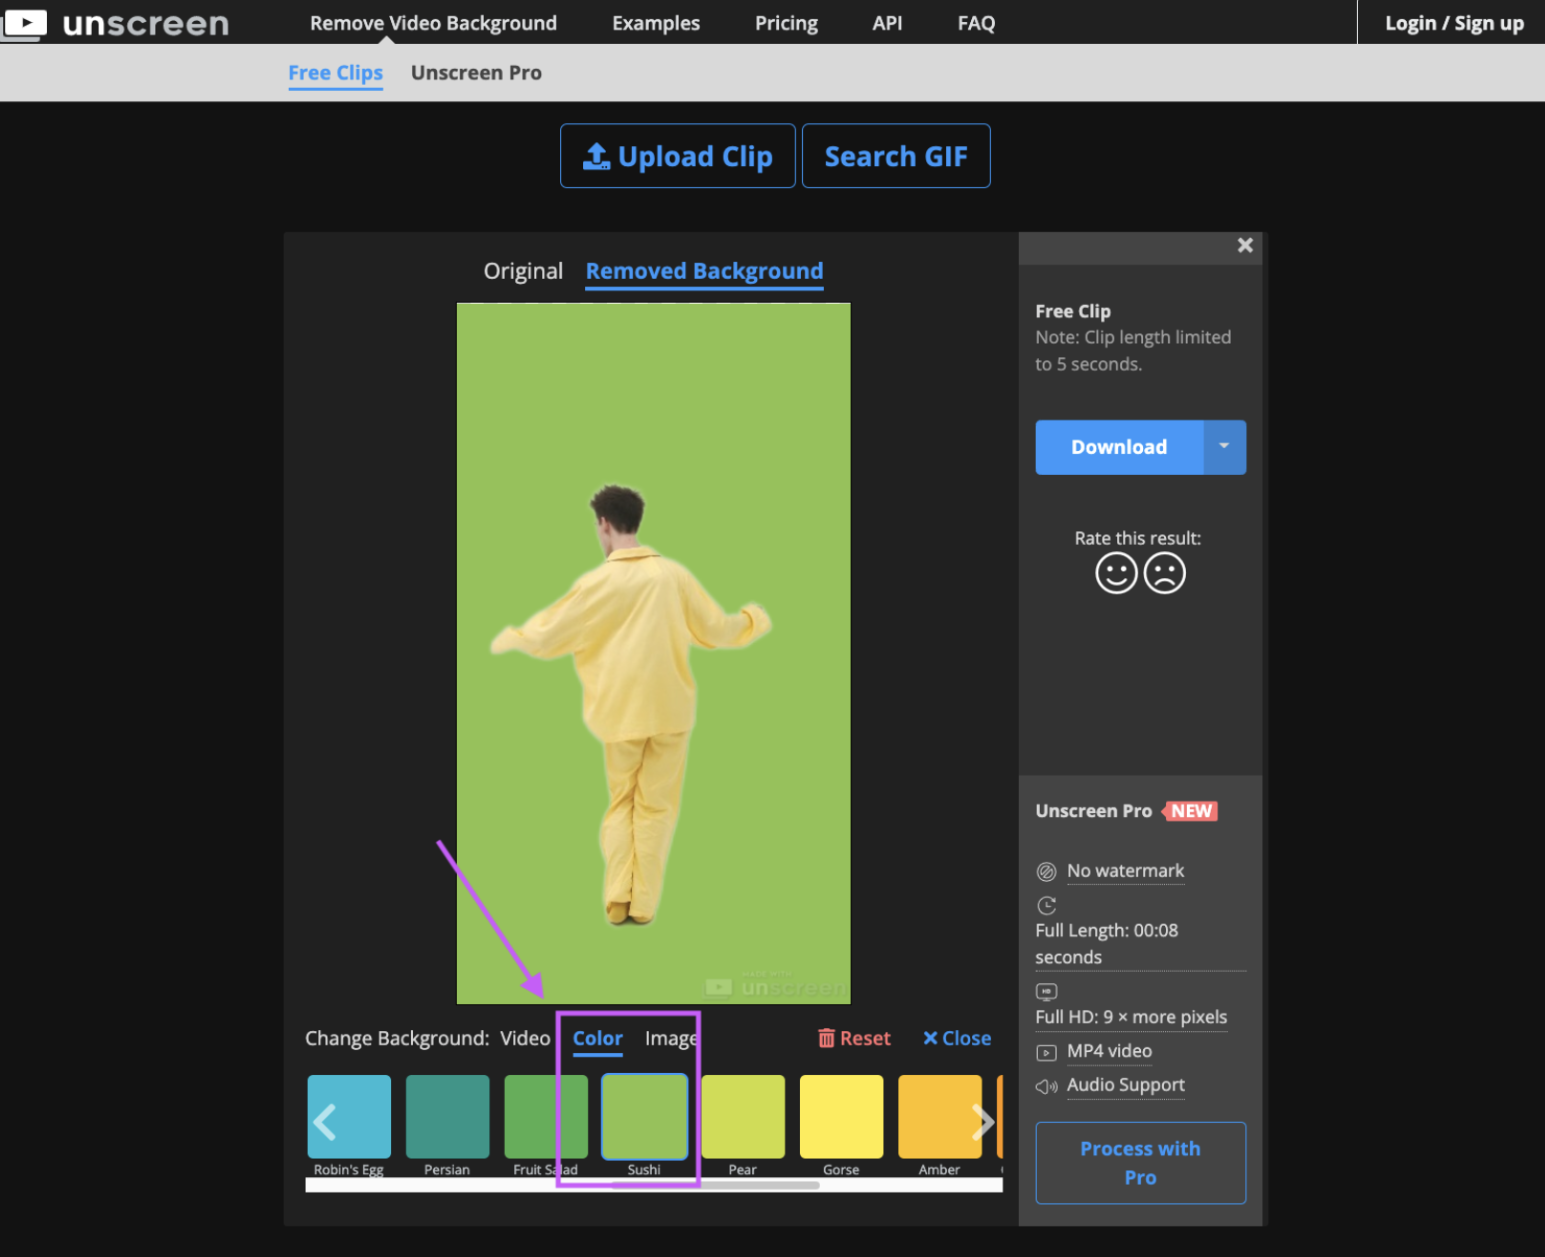
-
Now, you’re free to choose whatever background color you desire for your GIF.
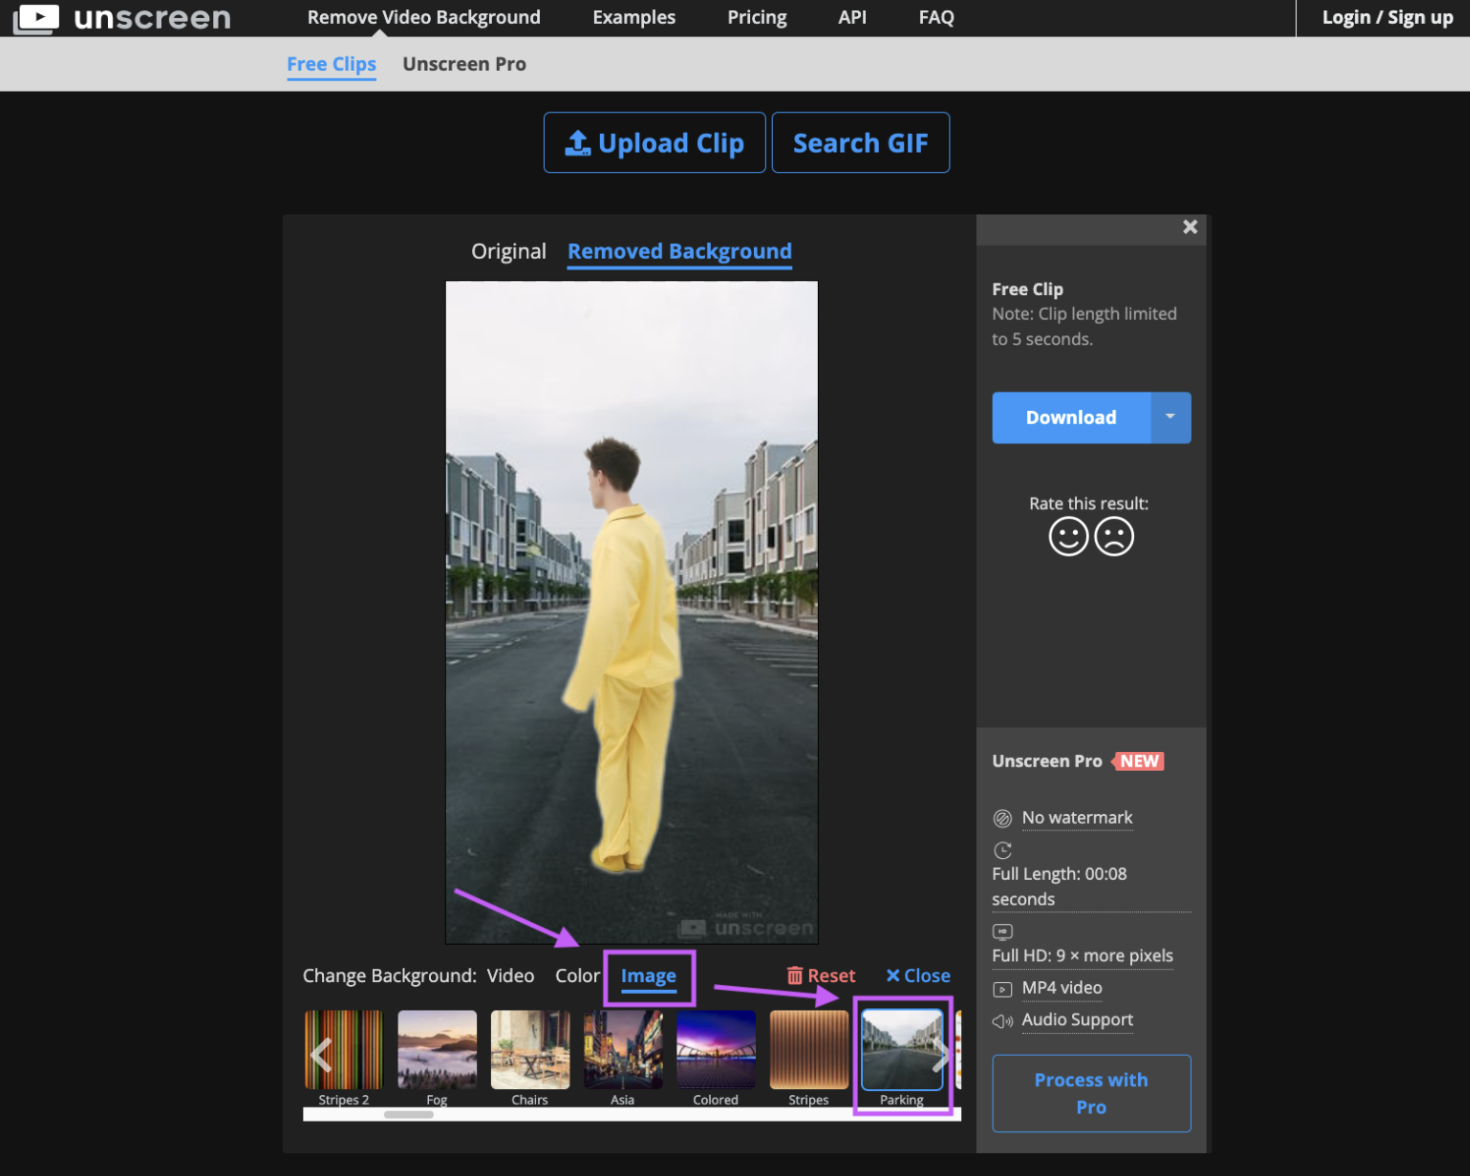
-
You can also select > Image to be able to change the background of your GIF to an image in the background. We went for this street, which looks pretty cool if you ask us.
-
To download the GIF with your new background (whether that's an image or a color), go ahead and click on the little arrow next to the > Download button and select > GIF.
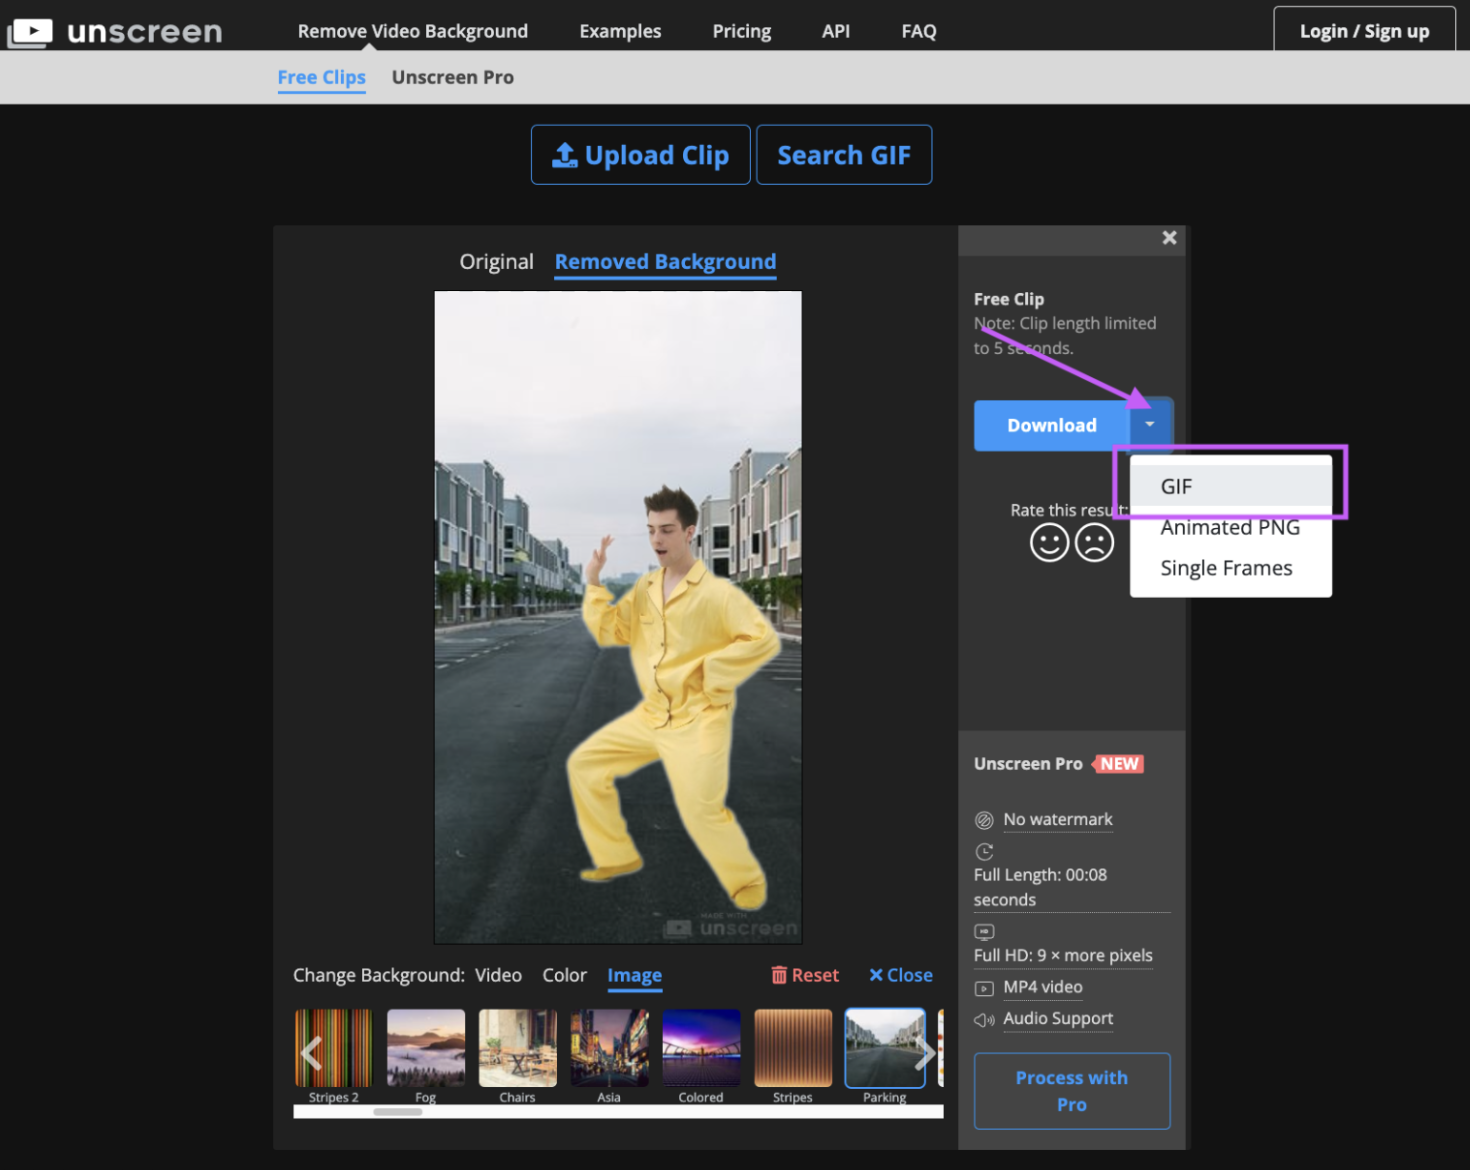
That’s it! Now you’ve created your very own unique GIF. Want it to have a particular message or funny quote in it? Keep on reading.
How to add text to your unique GIF
GIFs often have a funny quote or text to explain the ‘situation’ depicted in the video clip. Want to add some witty copy to your GIF? You can do that in just a few seconds using Canva.
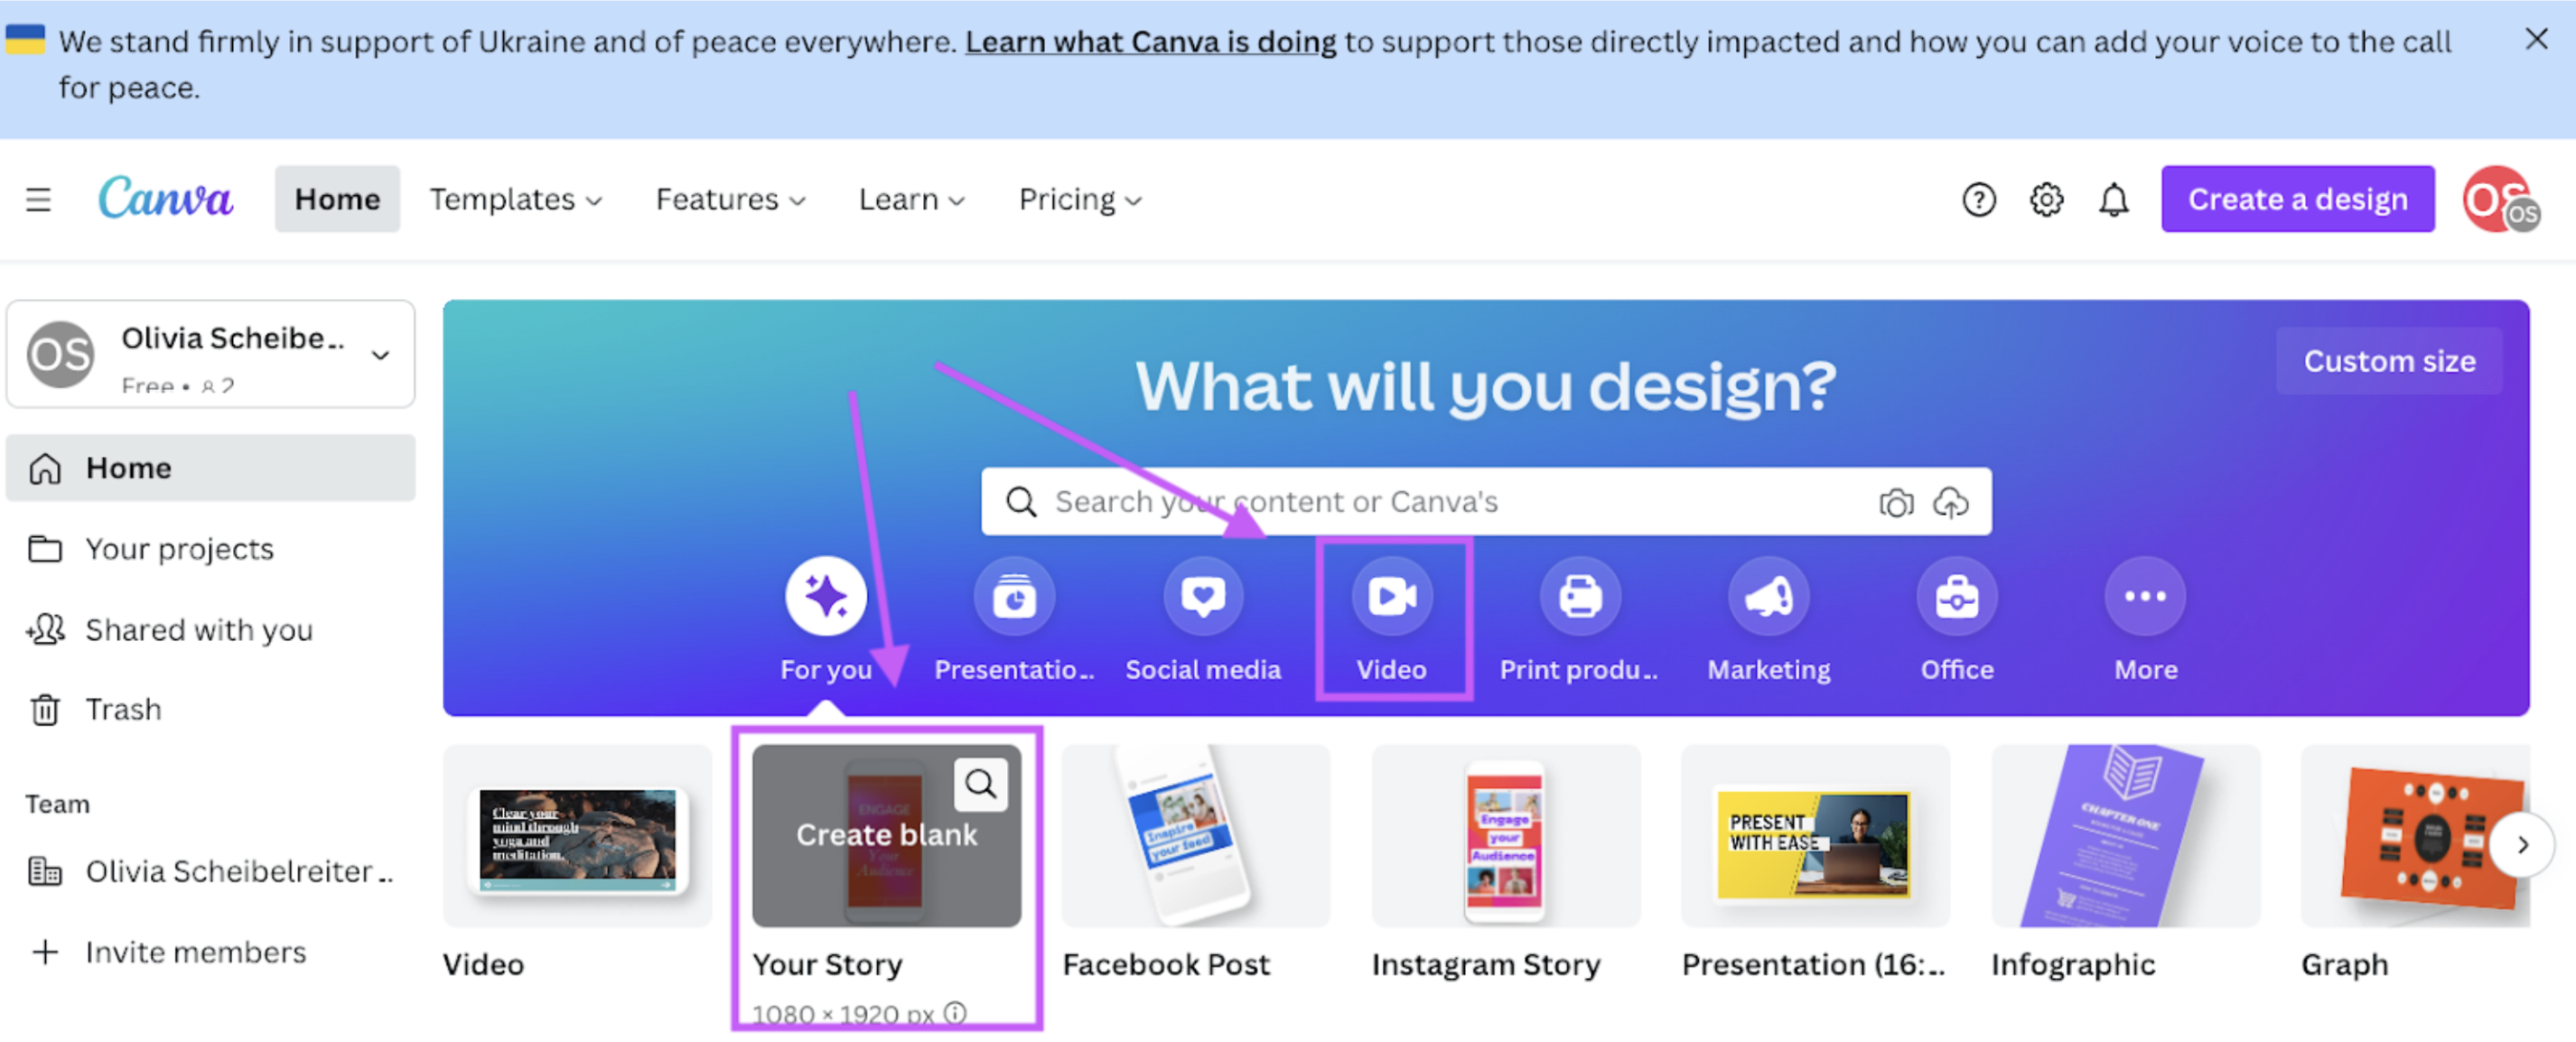
1. Hop on over to Canva and select or create your video format. We opted for the story format since our video is vertical.
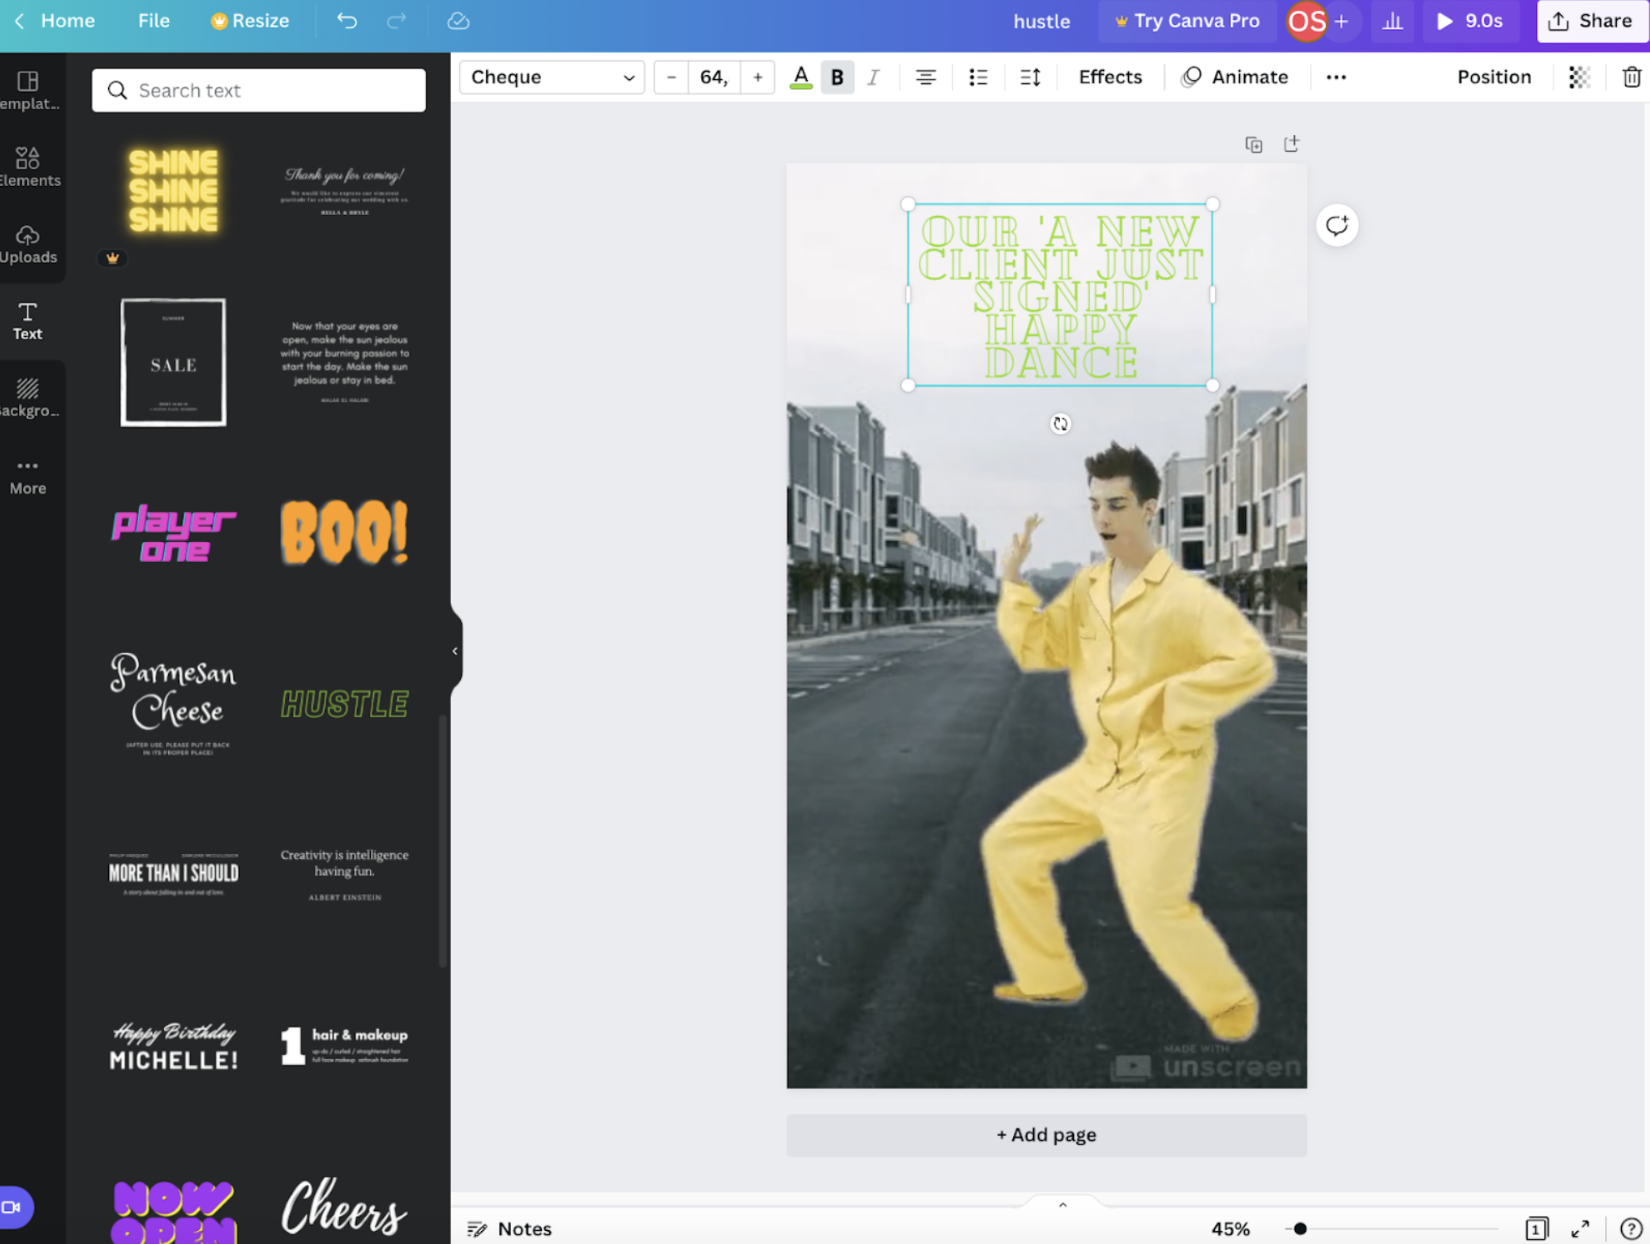
2. Go ahead and drag and drop your GIF into the left gray sidebar; the uploads will automatically open up. Then click on your video, and it will appear on the screen. Now drag the corners for it to cover the entire canvas.

3. Select > Text in the left sidebar and choose some text of your liking.
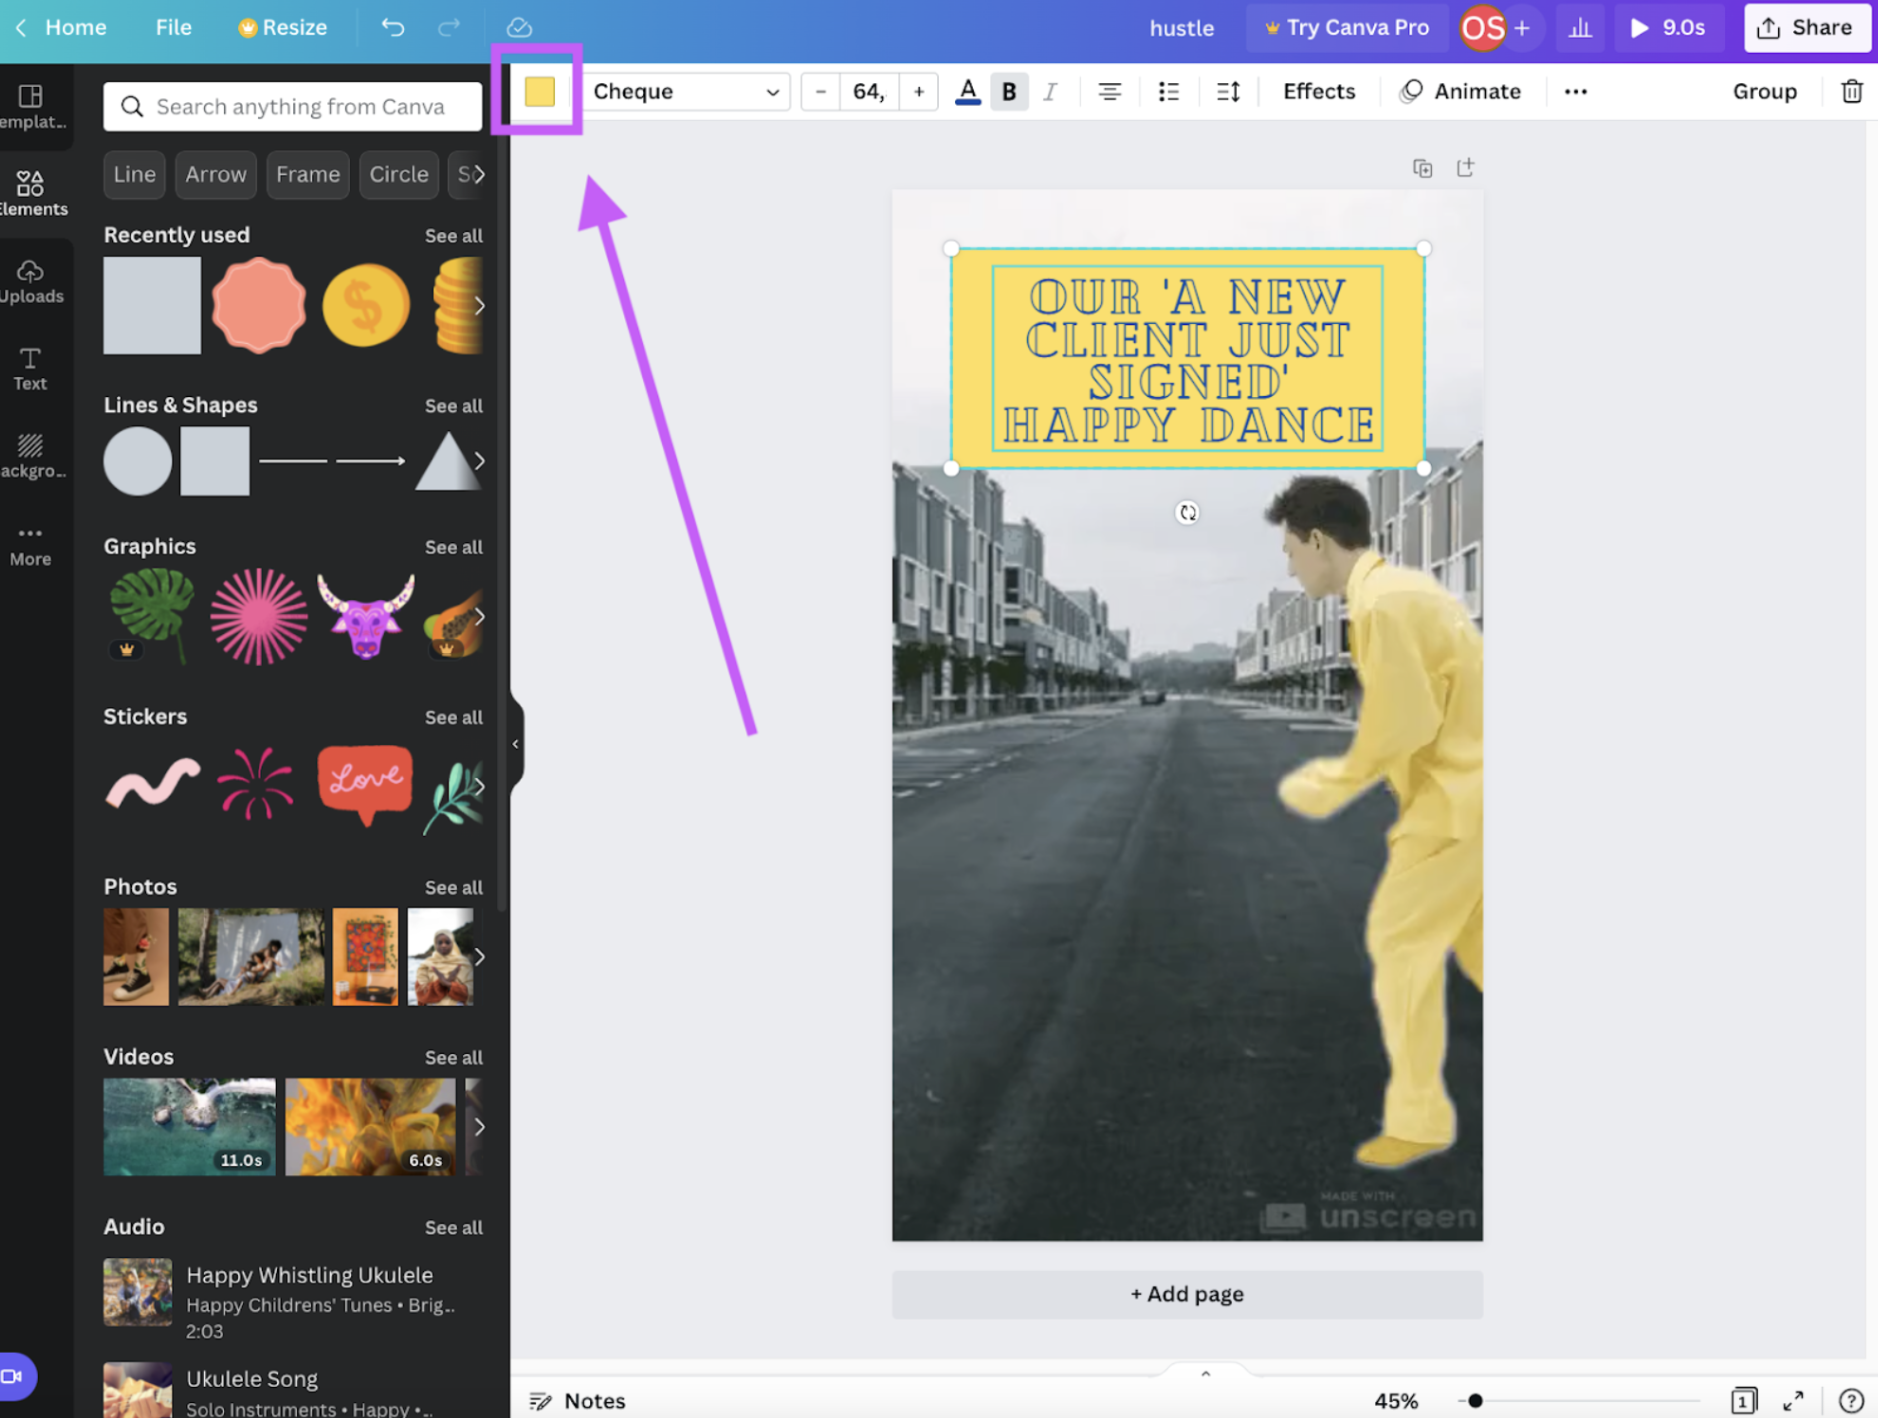
4. Now that you’ve added your copy, you might want to put some color behind it to make sure it stand out. We went ahead and selected > Elements > Rectangle. Above the canvas, you can select a different color. Drag the corners and sides to adjust the size and drag it around the canvas.

5. We ended up opting for a yellow background and dark blue font. You can adjust colors by clicking on the element you want to edit and then clicking on the colored square above the canvas to the left.
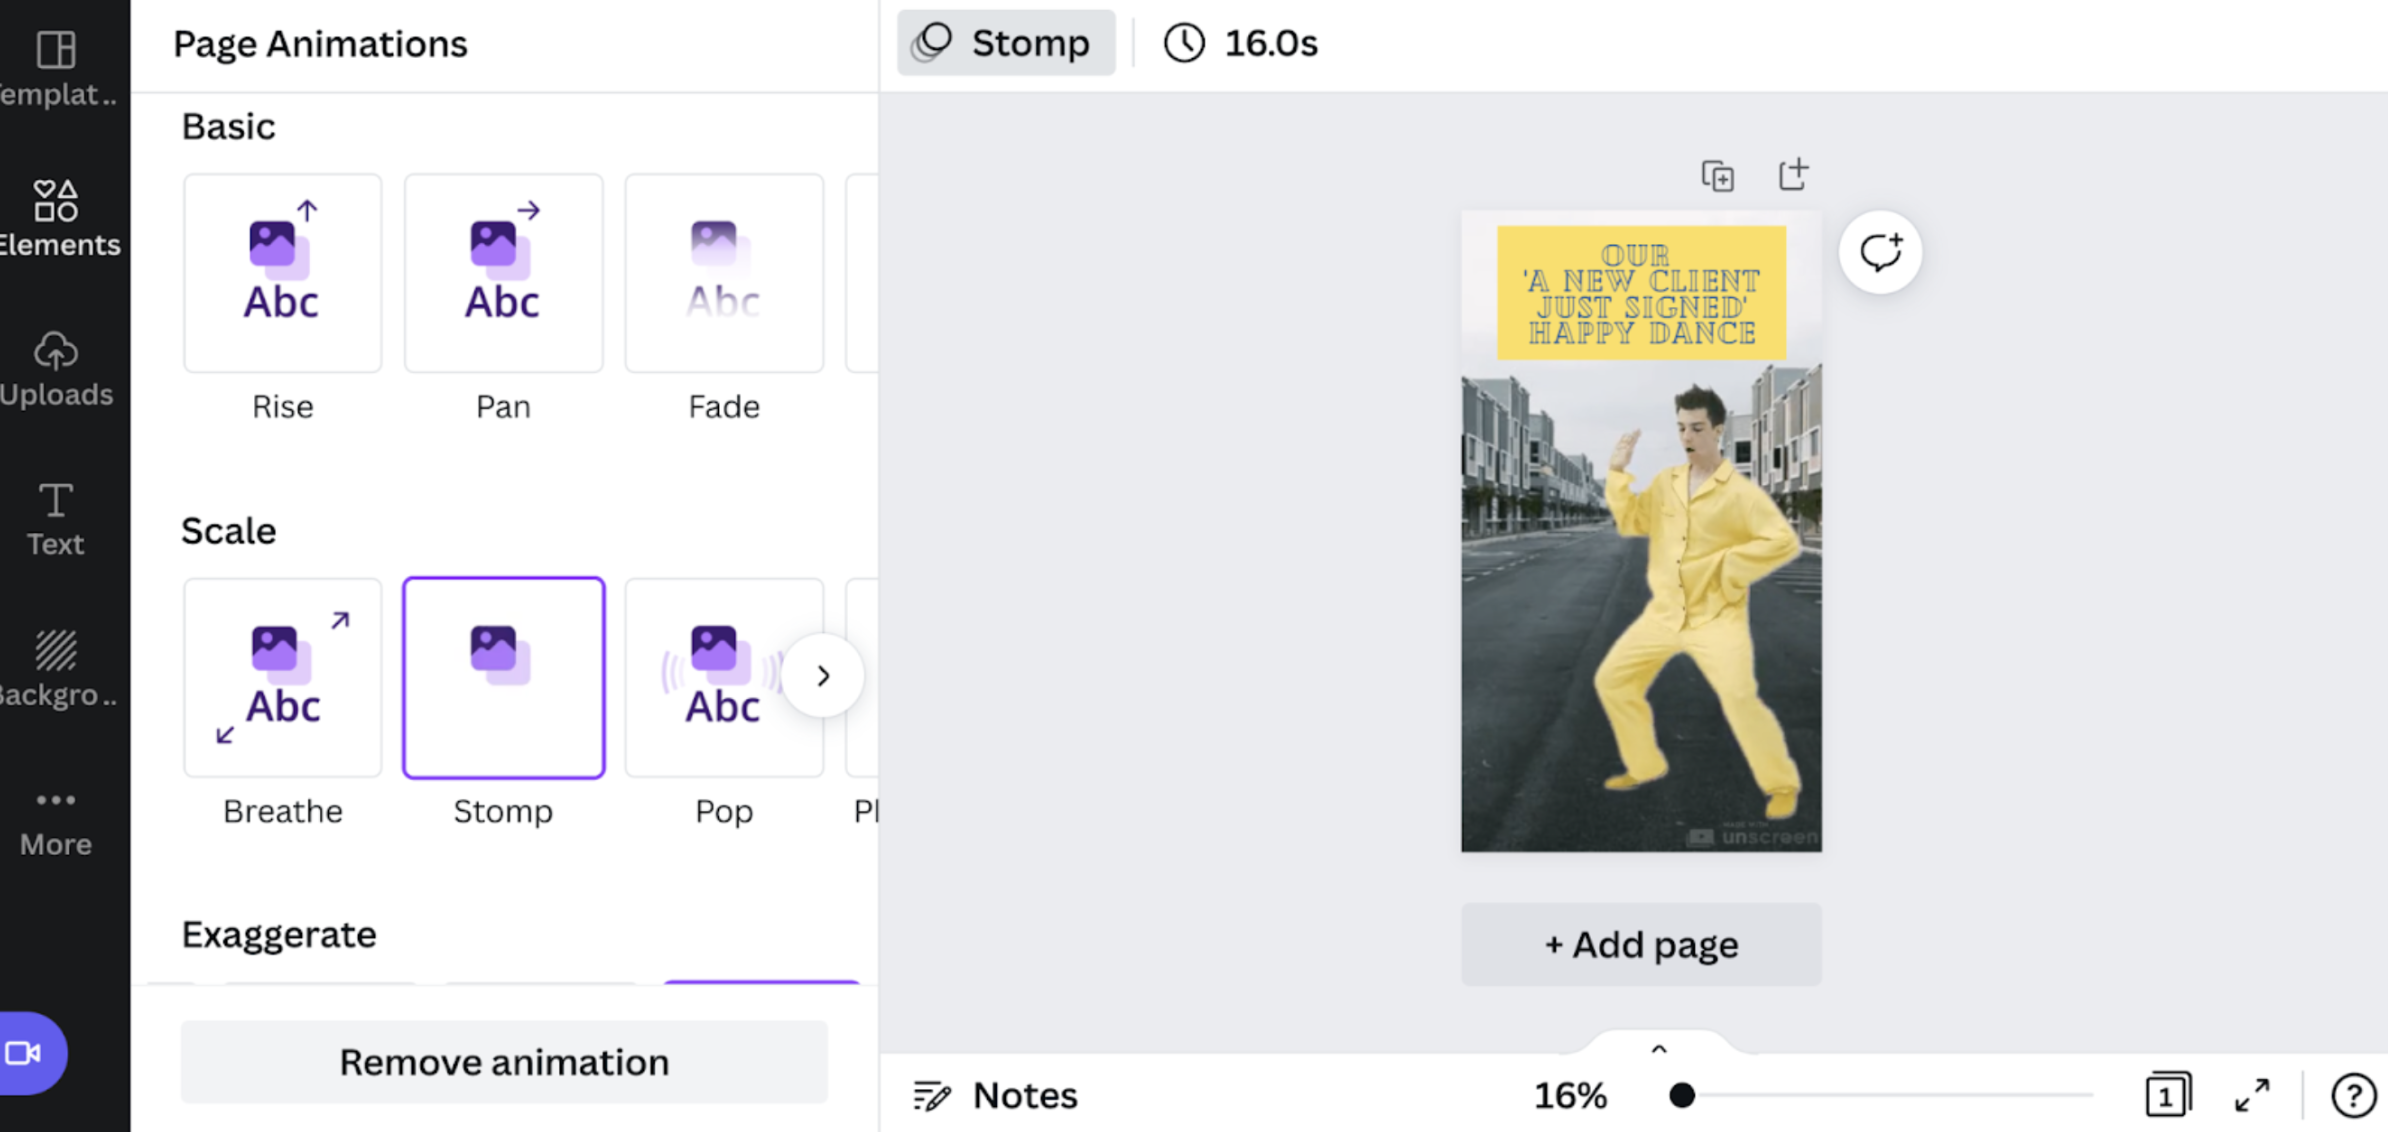
6. Want to create an animated GIF? Then, go ahead and tap on the canvas. In the top left corner of the Canvas > Animate will appear; click on it to make your own animated GIF. You can animate all elements on your canvas by applying this setting; it’s pretty rad.
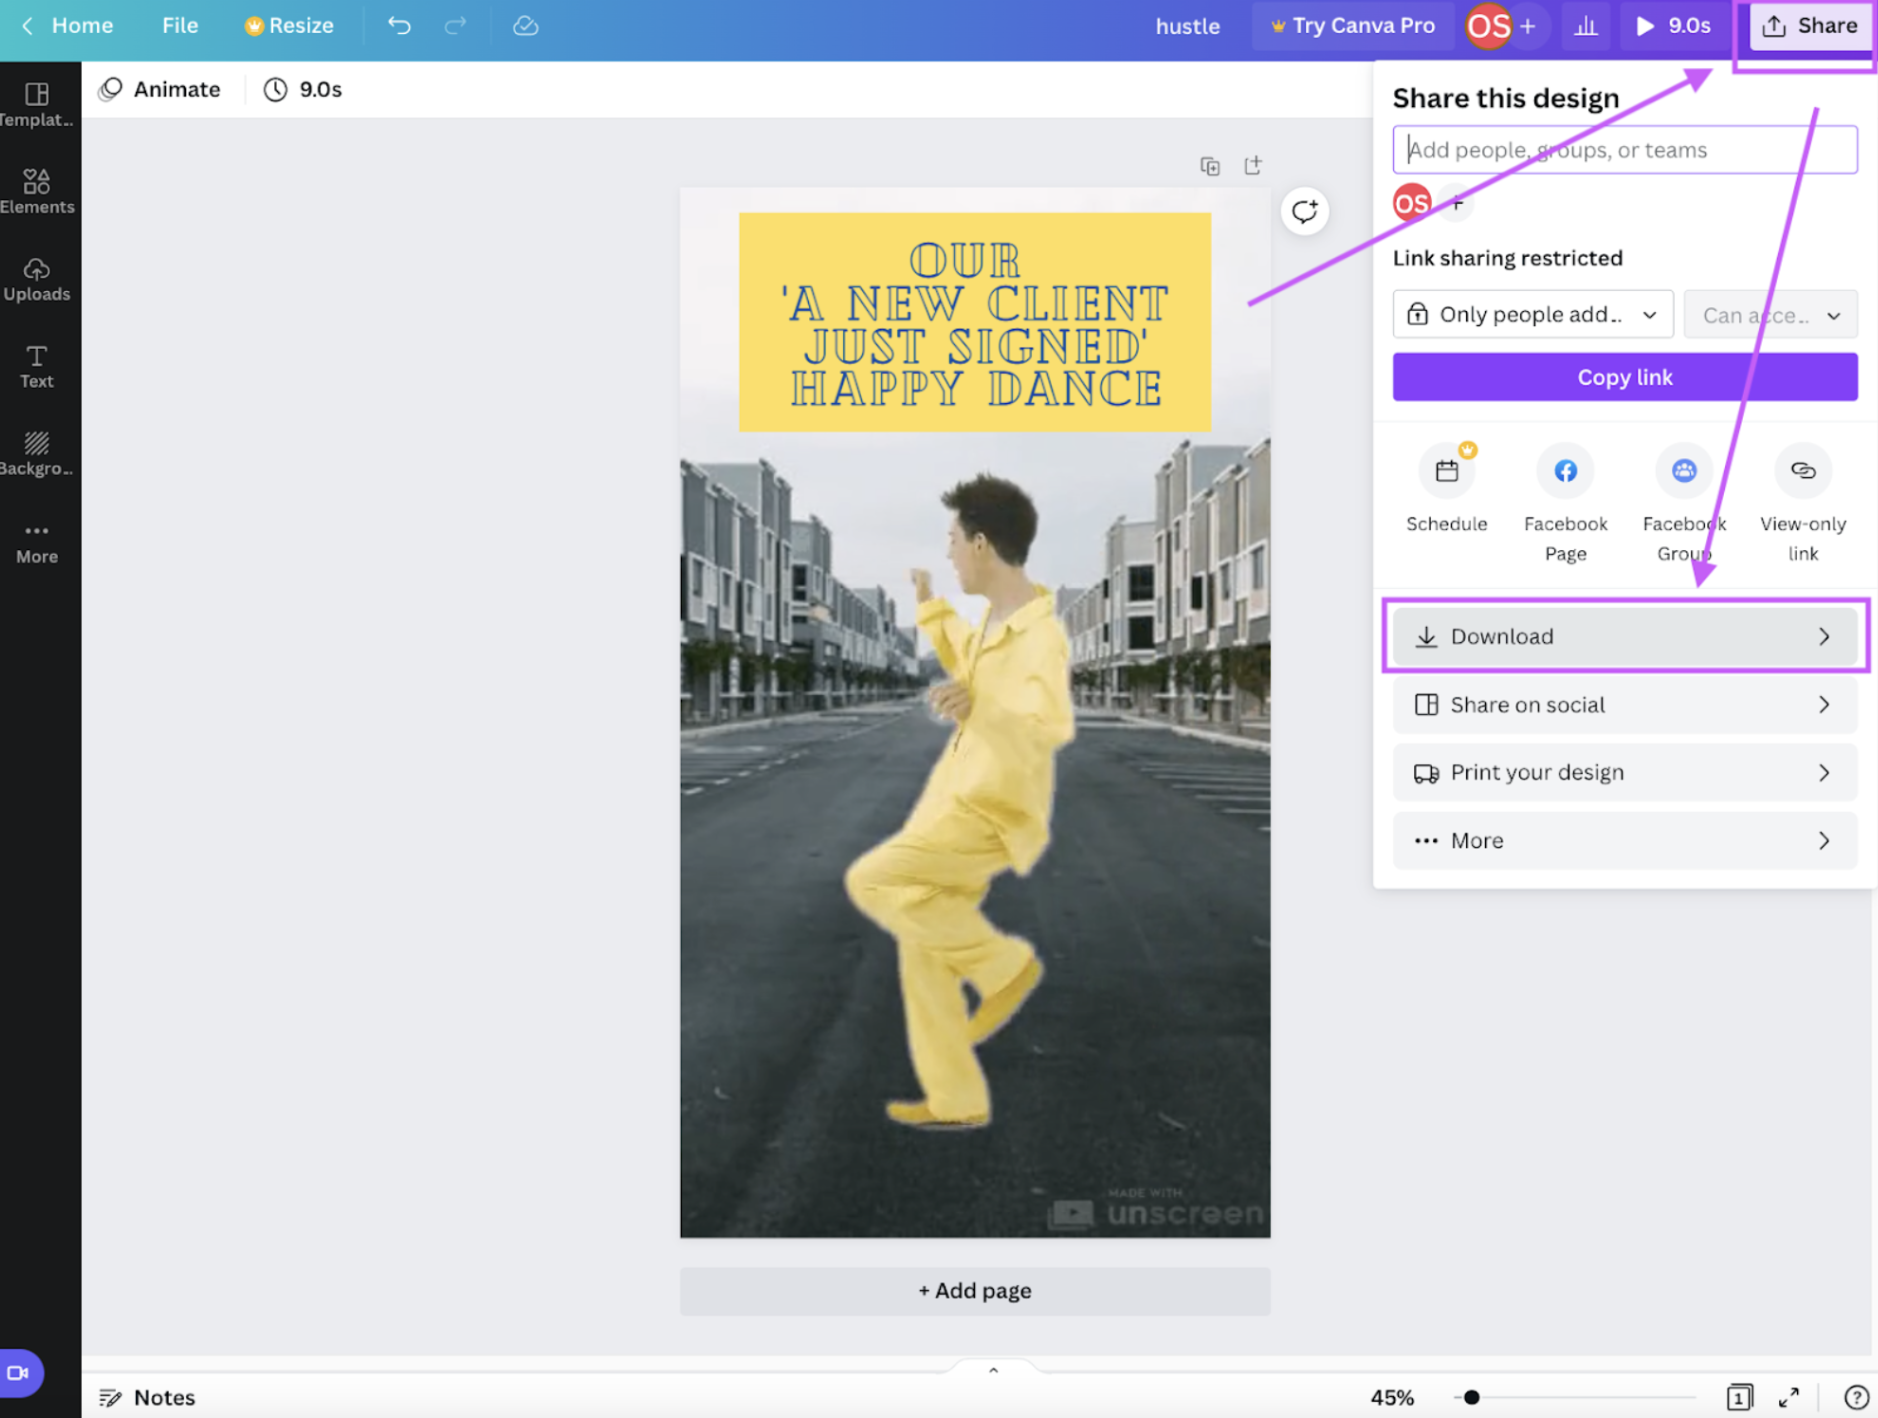
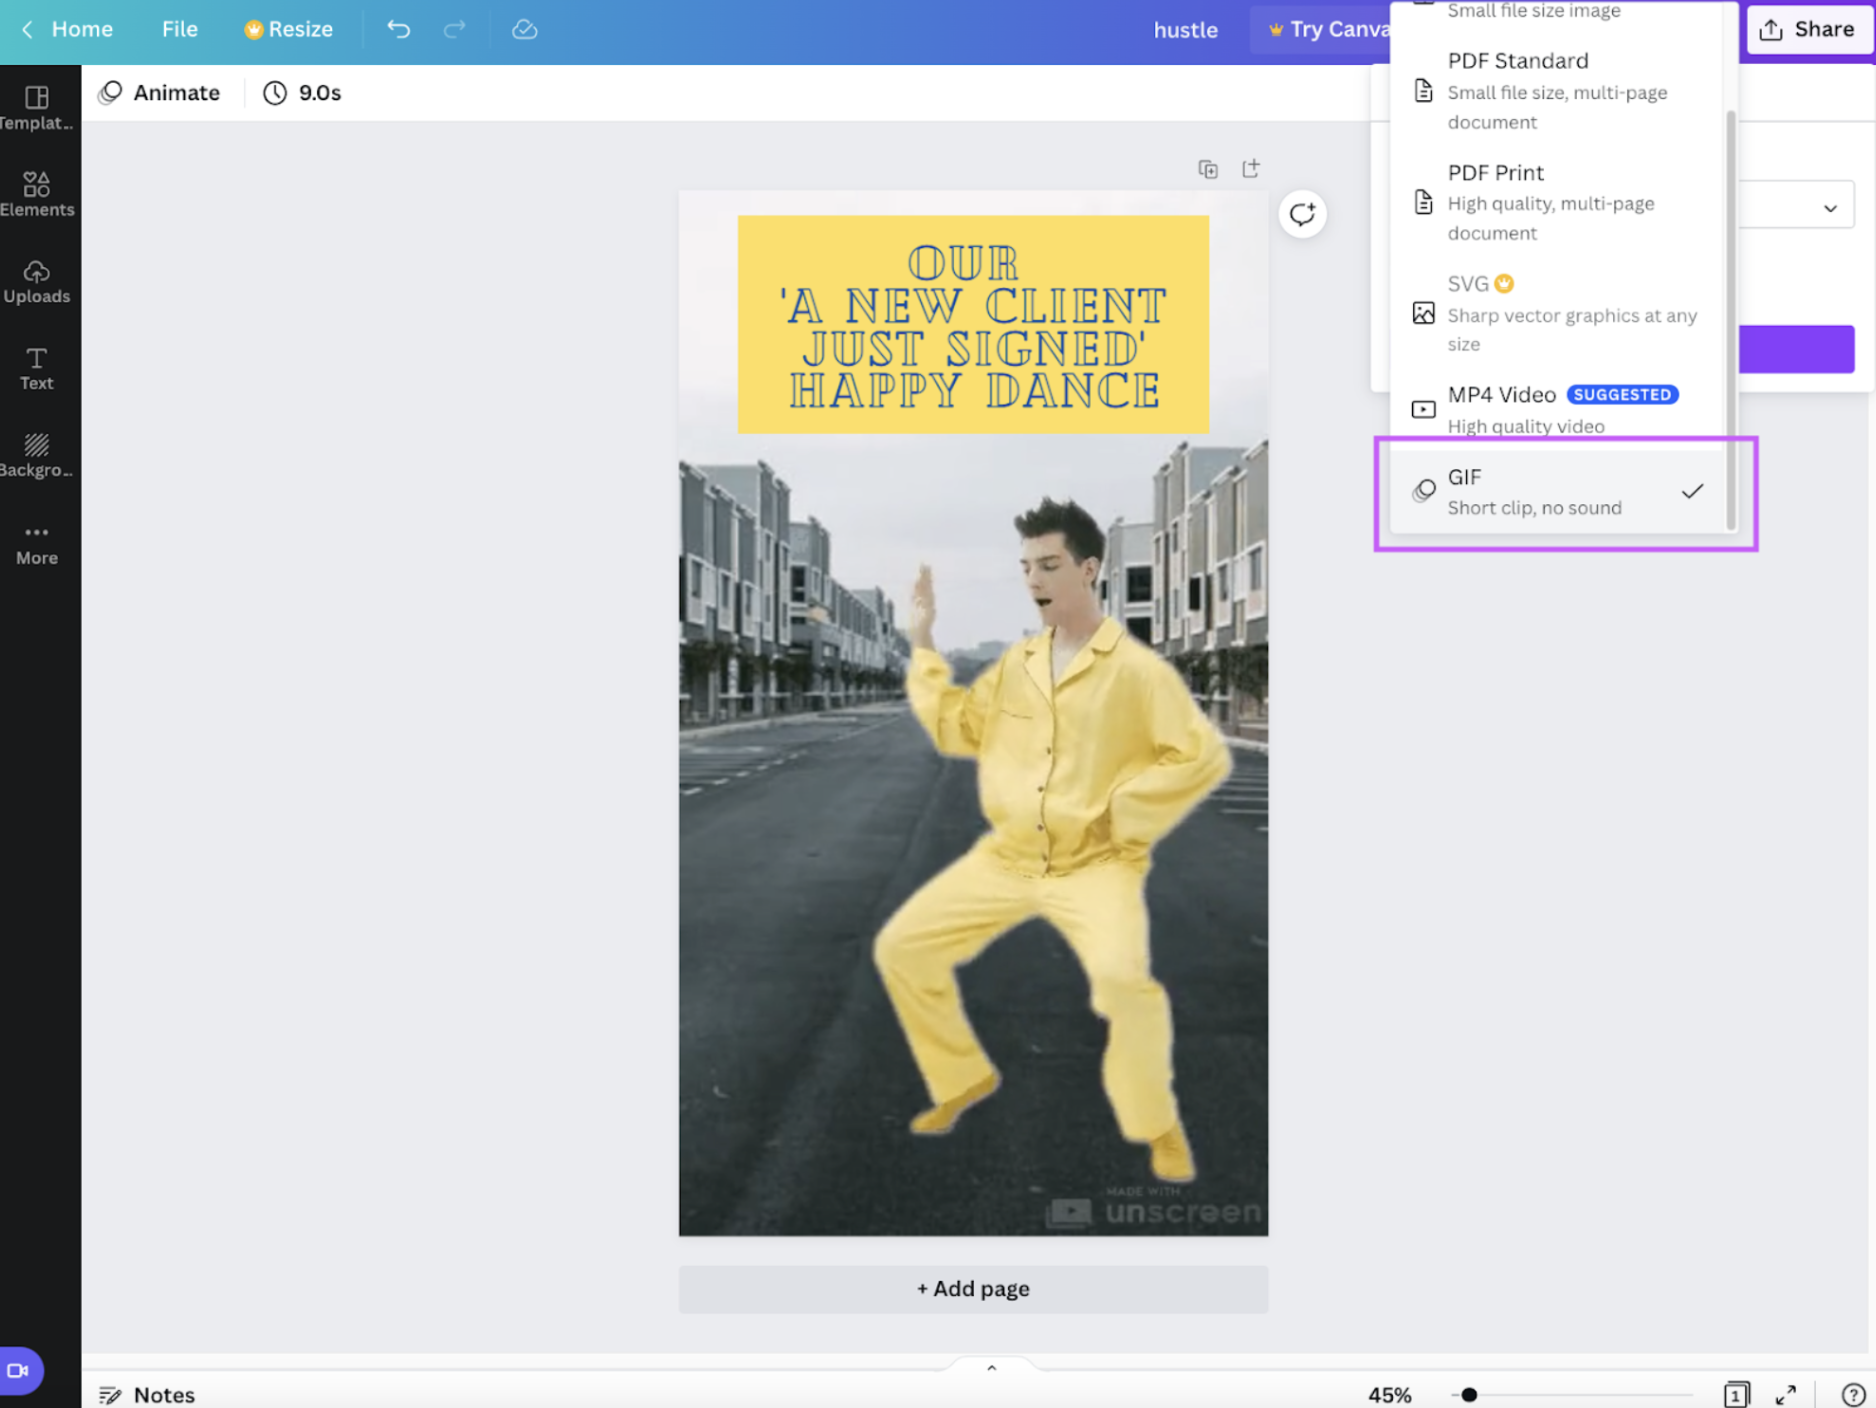
7. Once you’re happy with the GIF, click on > Share in the upper right-hand corner. Select > Download > and under Format > GIF.
How to upload a GIF of yourself on Giphy
If you want your GIF to be linkable and searchable online, you will have to upload it to Giphy. It’s a great way to spread your GIFs for other people to use them and maybe even bring visibility to your brand. To do this go ahead and:
Hop on over to Giphy and sign up for an account.
Then, drag and drop your GIF onto the tool.
-
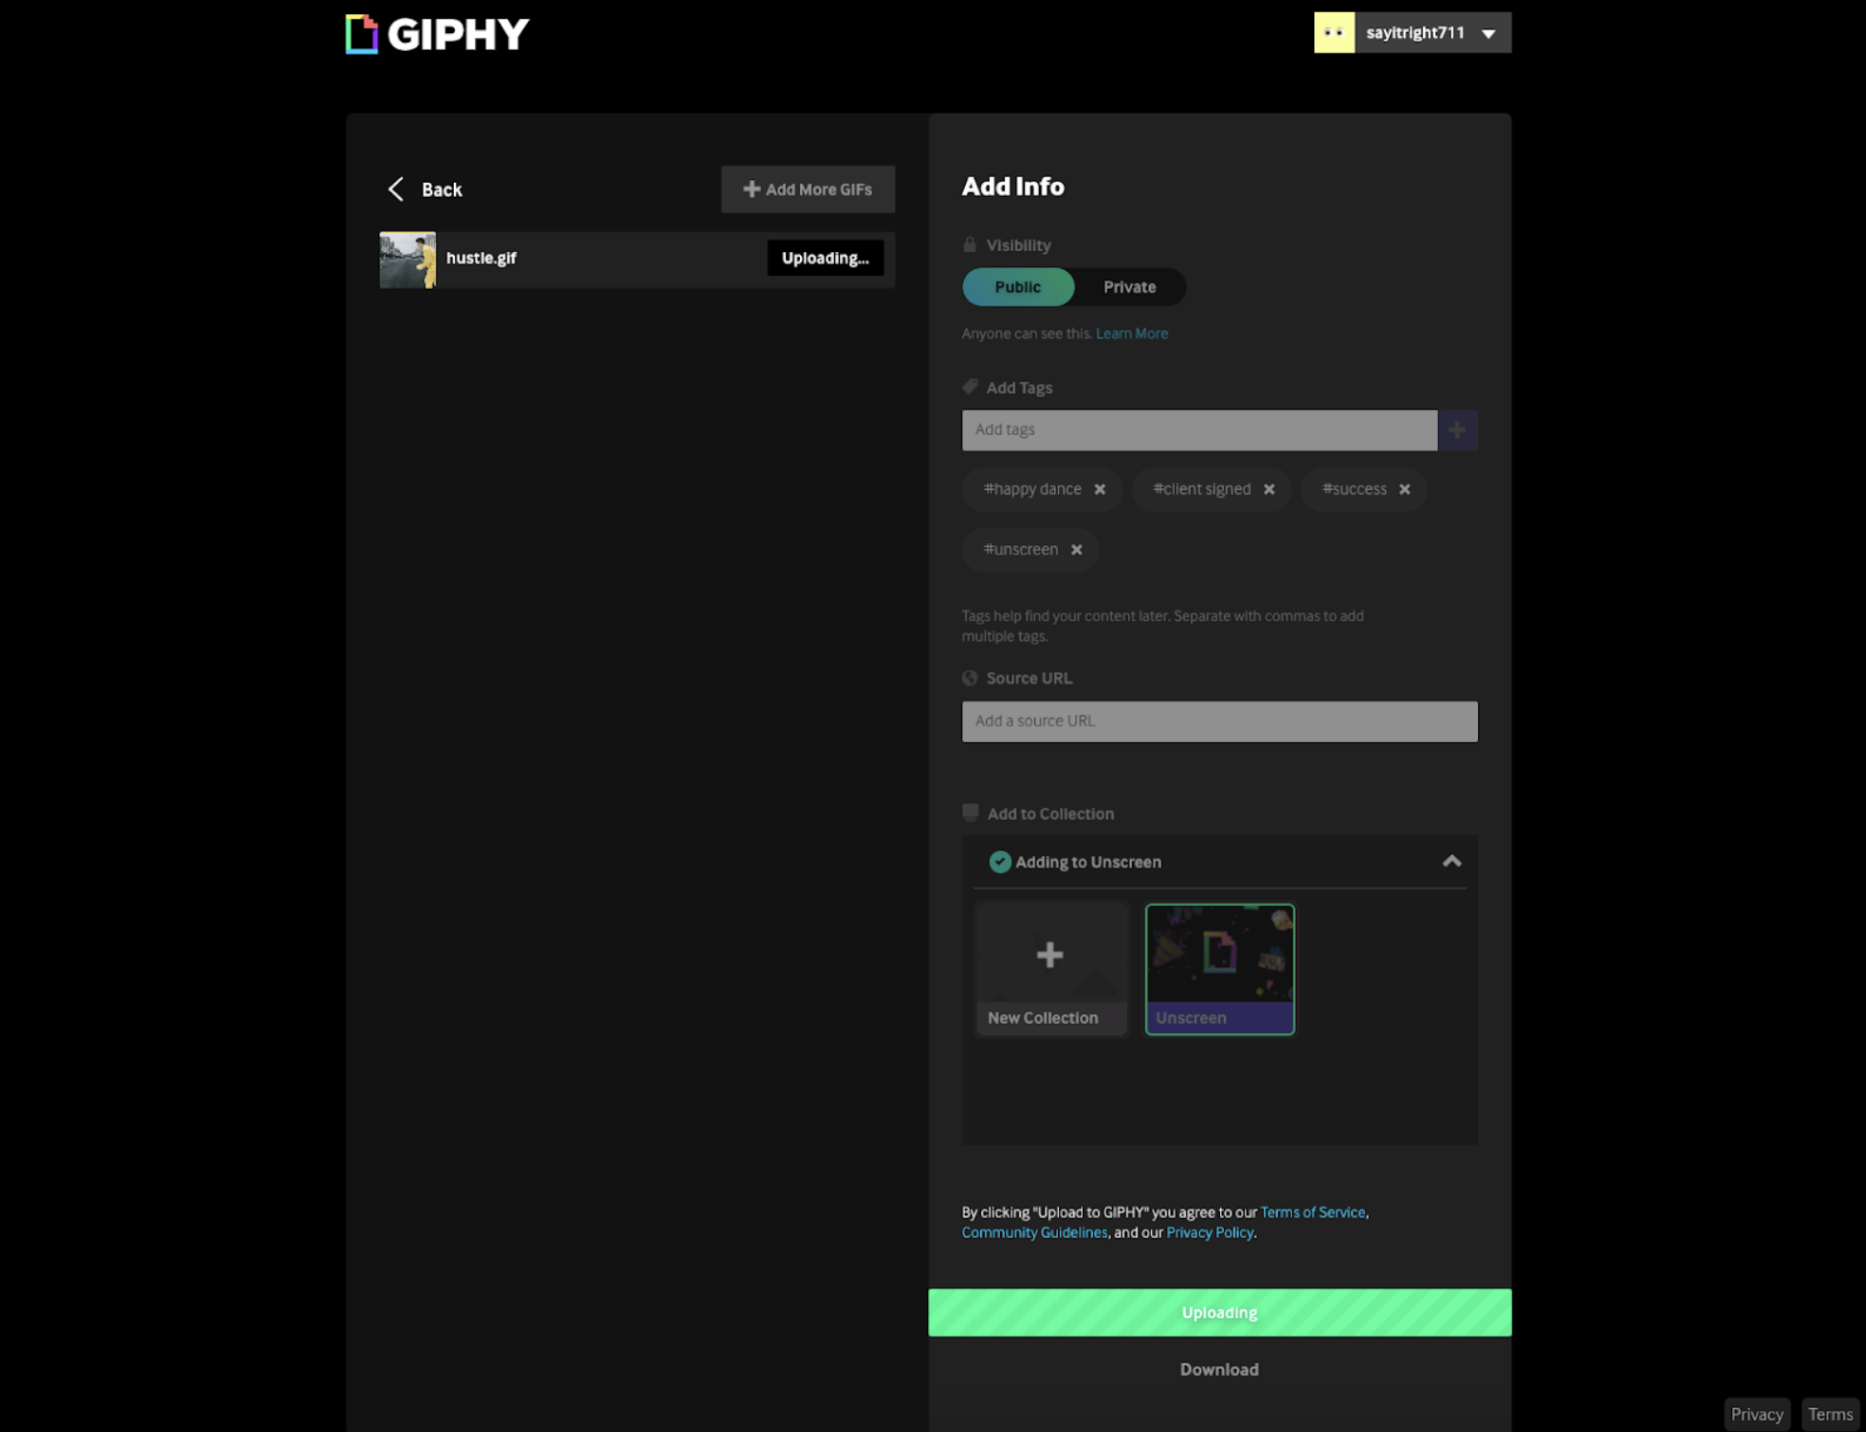
The tool will then ask you to add more info like tags so people can find your GIF and share it online. Here’s what our settings looked like:
If you click on > Embed right next to the GIF, you will get the code to embed into your website, so the GIF appears. Alternatively, you can also share the GIF using the > Share > Link.
This is how our GIF turned out:

Cute, right? It would almost have you dancing with it. So that’s it — how to create a GIF of yourself. Head to Unscreen and get started in just a few minutes.
Comments
No comments so far.