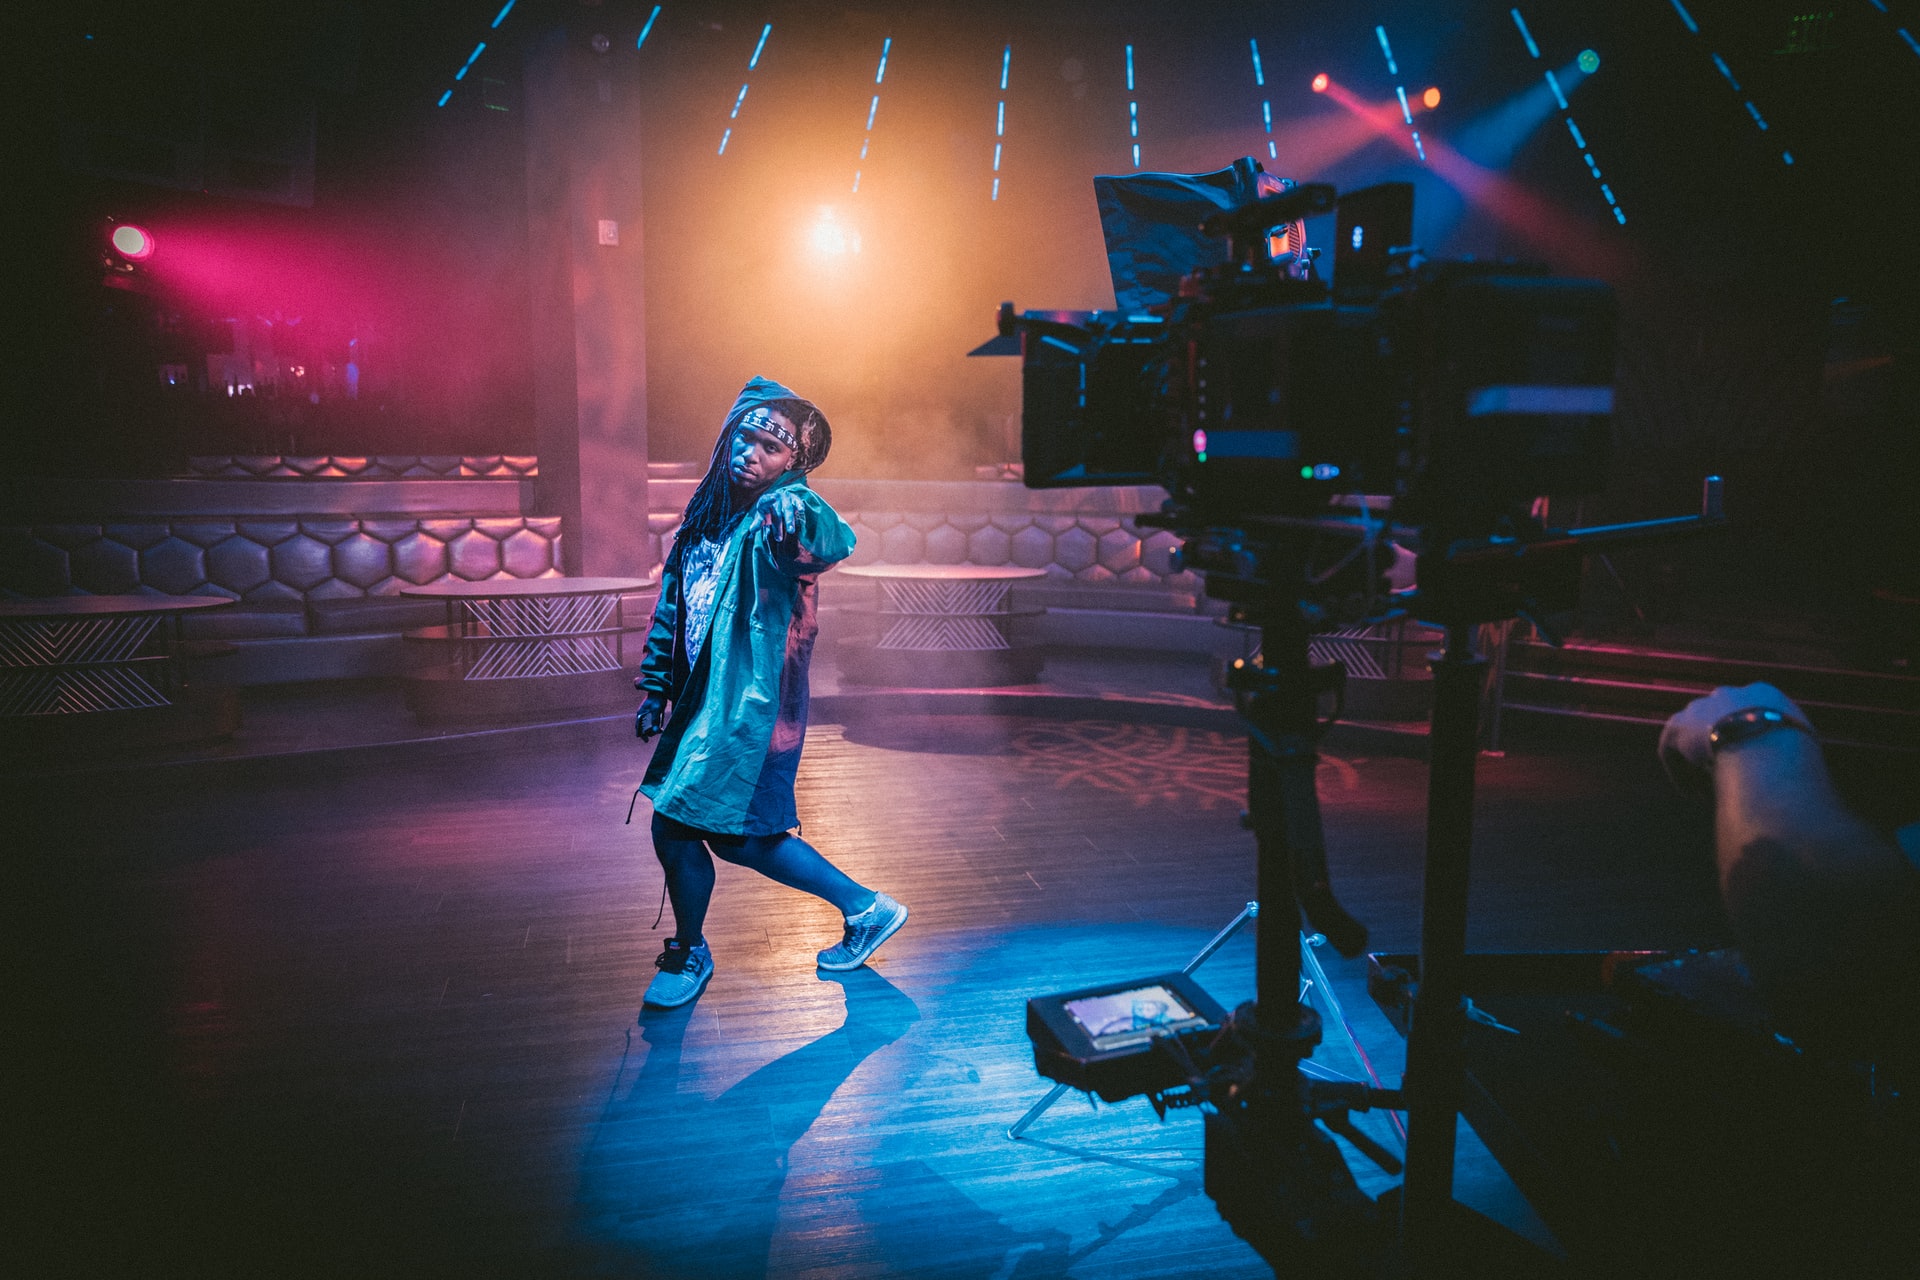
Color correction is all about ironing out the kinks in your video or film and giving it a human eye perspective. The process is about removing color and lighting mishaps to create a natural look and feel. Color grading is all about adding color to create a certain mood or effect. Both of these processes are carried out digitally using editing software tools to tweak your video footage. In professional videography, color is rated highly as the script, setting, and main characters.
Essentially, it’s never really a question of color grading vs. color correction, but rather how do they go hand in hand? And how does each process work? Before we jump into a breakdown, here’s a quick intro to video editing color lingo.
Color correction & grading basics: terms
Hue – this refers to a pure color, so we’re talking blue vs pink.
Saturation – this refers to the amount of hue (color) applied, usually making it more or less intense.
Luminance – this is related to the brightness, lightness and value of the color.
These are the most important terms you need to know, but as these things go, there are plenty more you will eventually stumble upon.
Desktop set-up for color grading and correction
Because daylight and artificial light will affect the way your video looks on your screen, you need a good desktop set-up when it comes to color grading and correcting. It’s not a good idea to do color correction on the go, sitting in an airplane, or on a train because the lighting will always differ. We recommend taking these steps:
Ideally, choose a room without natural light, aka windows that can affect the temperature and glare.
Calibrate your monitor to ensure you don’t have any funny night shift settings on etc.
You might also want to consider taking a color-blind test to ensure you really do see things the way others do.
Having a professional set-up and taking these steps will ensure you won’t need to do the same work twice.
Basic color grading tools and settings for videos
Every editor has a different approach to color grading, but here are the most common tools and steps videographers use for editing. These can usually be adjusted in the tools bar with sliders you can move left and right to increase/decrease these factors.
Brightness and Contrast
As the name suggests, brightness is used to adjust the brightness of the entire image. On the other hand, contrast is the intensity of the difference between light and dark areas in your video.
White balance
This scale allows you to create a warmer or cooler feel. If you want to create a cold feeling in the scene (say it’s a sad funeral scene), you’re going to want to add more blue tones. On the other hand, if you have a sunset scene in front of you, play around with reddish and orange tones to create more warmth. Shifting these tones around can also affect how natural or unnatural a video seems – so play around with it.
Sharpening
Great for sharpening edges of object and subjects in the scene, use this tool with caution — too much sharpening looks unnatural and usually not as good as in photography.
Color match
Already have a reference video scene saved and want to recreate the look? Color match is your friend. It will swipe the color grading from your reference file and adjust your video accordingly.
Top color correction and grading video editing software
You’ve got a few options to choose from when it comes to video editing, but these are our top picks when it comes to color correction and grading. All of these tools can do both. As we already mentioned, you should first color correct (adjust the image to a natural look and feel) and then go into more dramatic color grading to create a particular effect or mood.
Which one you choose really is up to you. Experts say that pretty much every one of these three is a viable option even for beginners and are all on the same level concerning how ‘easy’ they are to learn. What’s left for comparison is which one is better for you and the price. Adobe premier is priced as a yearly or monthly subscription model (around $239.88 per year), whereas DaVinci and FinalCutPro are a one-time investment thing (around $299).
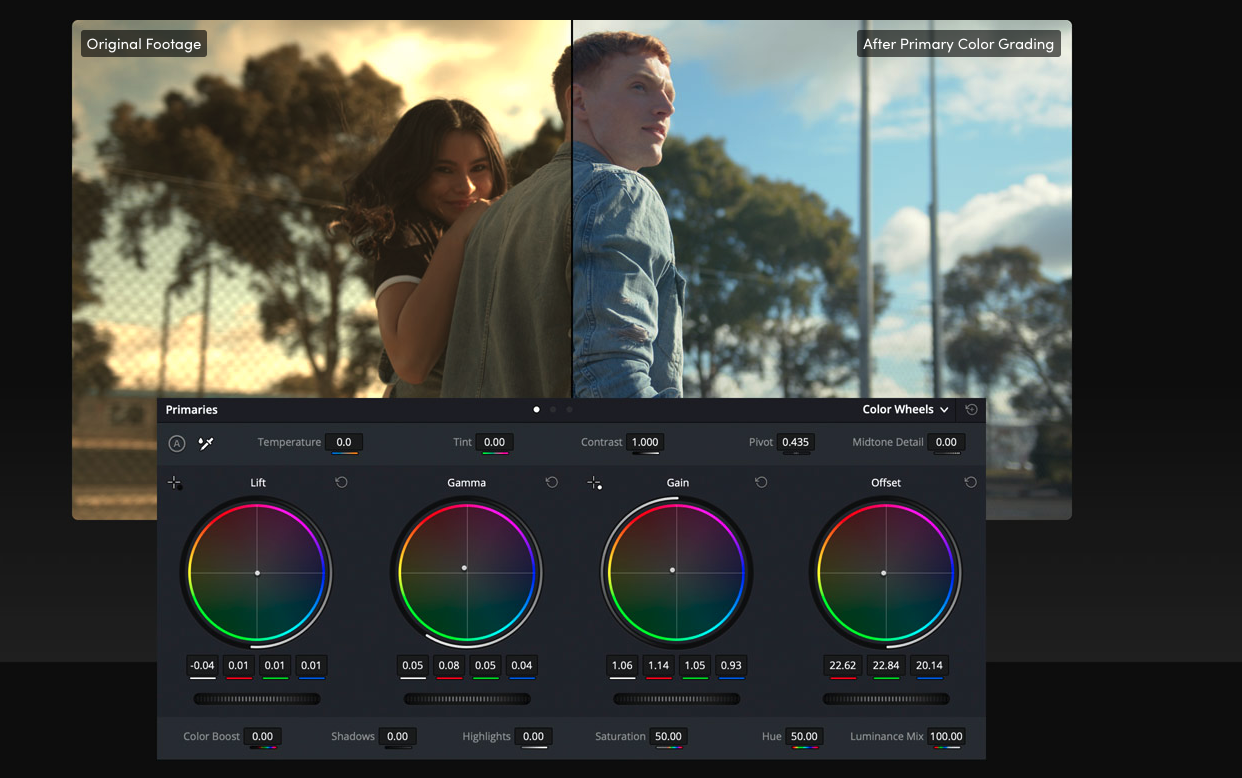
1. Color grading Adobe Premiere Pro
Adobe Premiere Pro is a powerful tool widely used in the video editing industry. We’ve covered essential features we recommend using for color correction and grading:
Fast color corrector
Covers the most important basics and is great for when things need to happen a little faster — the fast color corrector allows you to set your white balance, switch up the saturation and boost a particular color hue.
Three-way color corrector
Like the fast color corrector, this tool is a little more complicated and in-depth — you now have three color wheels to adjust, each representing shadows, mid-tones, and highlights.
Secondary color correction
Allows you to separate a specific section of the video frame (such as the sky only) so you can only adapt the color of this feature.
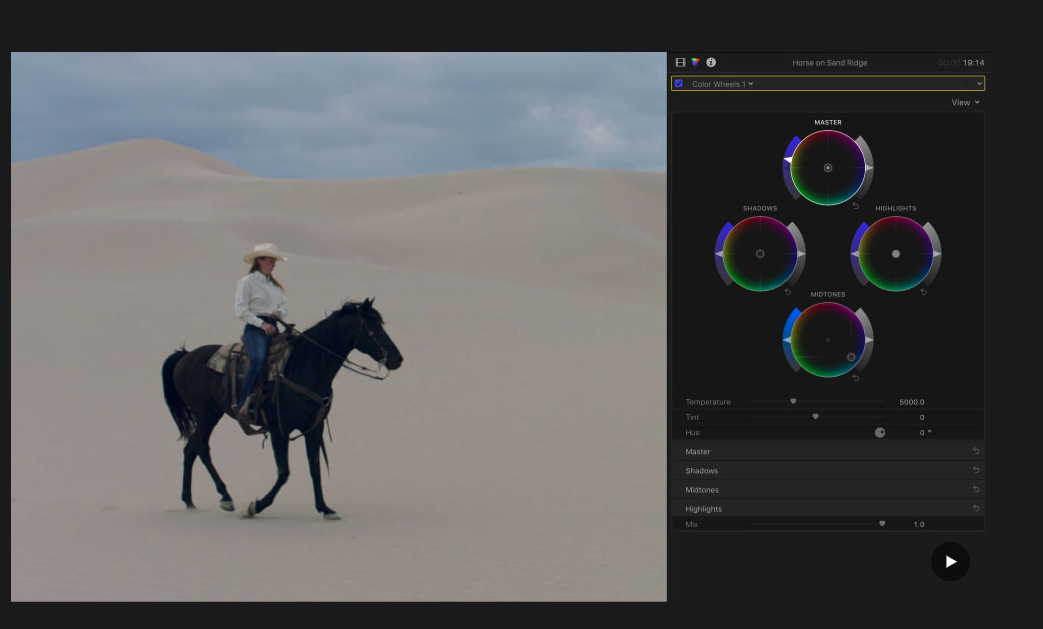
2. DaVinci Resolve color grading
DaVinci Resolve is a fantastic free video editing tool with lots of functions to play around with.
Primary correction tools
This toolbar is perfect for initial color correction and balancing image color to be natural. These tools affect the entire image; you can drag each wheel’s tonal ranges to tweak and balance your shot. You also have primary adjustment controls to shift saturation, temperature, hue, and more quickly.
Auto balancing and matching
You can use this beneficial tool to match video shots that might have been recorded with different cameras – giving them the same look and feel and allowing you to combine footage from other devices.
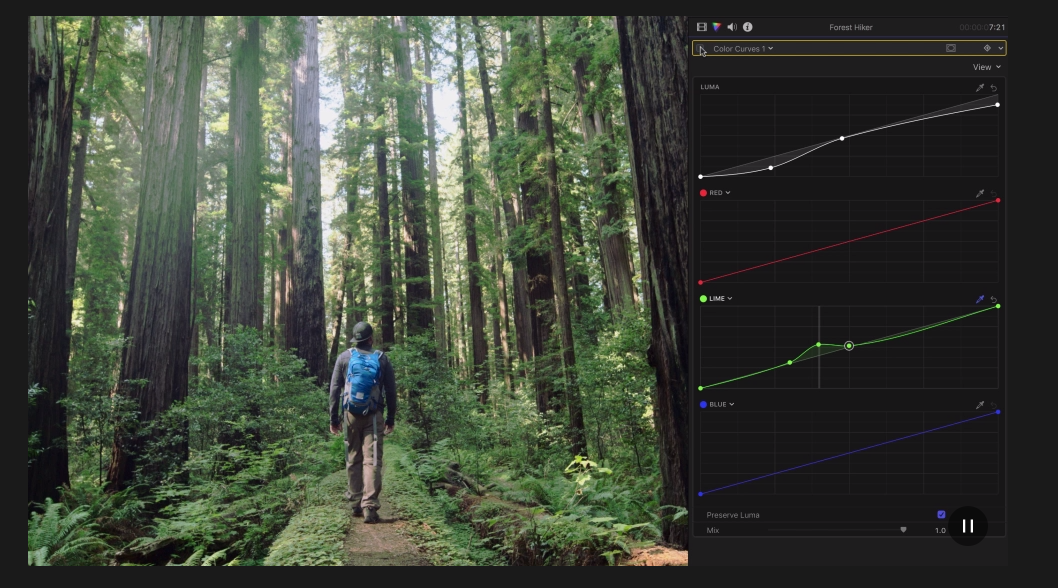
Curves
Now we’ve moved into more detail. Curves allow you to adjust individual sections and areas of the shot, separately from the rest.
These are just the basic primary color correcting and grading tools in Davinci Resolve, but the tool hosts endless secondary tools you can dive into once you’ve got the hang of things.
3. Final Cut Pro color grading
Auto color correct
A nifty little helper in a final cut pro is the auto corrector that will save you time color correcting when you’re in a hurry.
Color wheels
These combine hue, saturation, and brightness into one and have a simple drag system to adjust each aspect.
Color curves
These allow subtle color correction and grading by being able to select specific areas of the shot.
Hue / Saturation Curves
This feature allows you to “sample a color with an eyedropper and change just the hue, saturation, or luminance of a specific color within the image.”
That wraps up our breakdown of color grading vs. color correction. Of course, we are just grazing the surface of what these powerful tools can do to help you out. Most of them have a free trial, so go ahead and give them a try; use the most important features we’ve presented and intuitively see what works best for you. Happy coloring!
Comments
No comments so far.