Want to ensure that your video edits look perfect no matter whether they’re viewed on an iPhone, iPad, desktop, or printed out on paper? It’s time to calibrate your screen, here’s a breakdown of just what that is and how you can go about doing so.

What is monitor color calibration?
One of the most important things to take into account when editing videos are colors, shadows, and the brightness of the video. Monitor calibration is setting your screen to a certain standard to ensure you get the most realistic and professional result.
Why is monitor color calibration important for video editors?
Monitor calibration is likely most important for video editors because their videos will sometimes be used time and time again for campaigns — be it across the hero of a website, printed on a leaflet, or as a header of an email newsletter. Monitor color calibration makes the entire process more efficient (avoiding mistakes and color hues you weren’t going for) and ensures you truly get the result you were going for.
How often should you calibrate your monitor?
You should calibrate your monitor anywhere between 2-6 weeks / at least once a month if you’re professionally working in video editing and color correction.
How to calibrate your monitor?
Generally speaking, there are a few ways to calibrate your monitor — with an online tool, desktop hardware, or integrated monitor calibration tools.
One we can not recommend is using an online tool, these tools have been known to be quick-fix options that simply cannot achieve a professional calibration effect.
The quickest way to get results for free is to use the windows and mac integrated calibration tools. But before you get started with any type of calibration, be sure your computer or laptop is up and running for at least 30 mins for it to hit its usual brightness level.
If you’re really serious about calibration though, even these methods won’t do because it relies on you manually adjusting the monitor according to what you see. And what you see is completely subjective. If you want to be sure you get things right, you’ll want to invest in hardware calibration with complimentary software — more on that below, but first, let’s show you how things are done on Windows and Mac:
How to calibrate your Windows 10 monitor
Go ahead and enter > Display settings by right-clicking on your screen or searching for it in your search back
Go to > Advanced display settings
Choose recommended resolution.
Now go ahead and choose ‚Color calibration‘ > Next.
Adjust, your gamma, brightness, contrast according, and color balance according to the examples.
Select > Finish to complete the calibration.
How to calibrate your Mac monitor
Go ahead and select the Apple icon in the top left corner of your screen.
Now go to System Preferences > Displays > Color.
Choose Calibrate > Screen calibration assistant.
Select a white point according to the example.
Give your color profile a name.
Click on > Finish.
Important monitor calibration values to watch out for
If you decide to go the manual route of color calibration, these are the values you should watch out for and adjust.
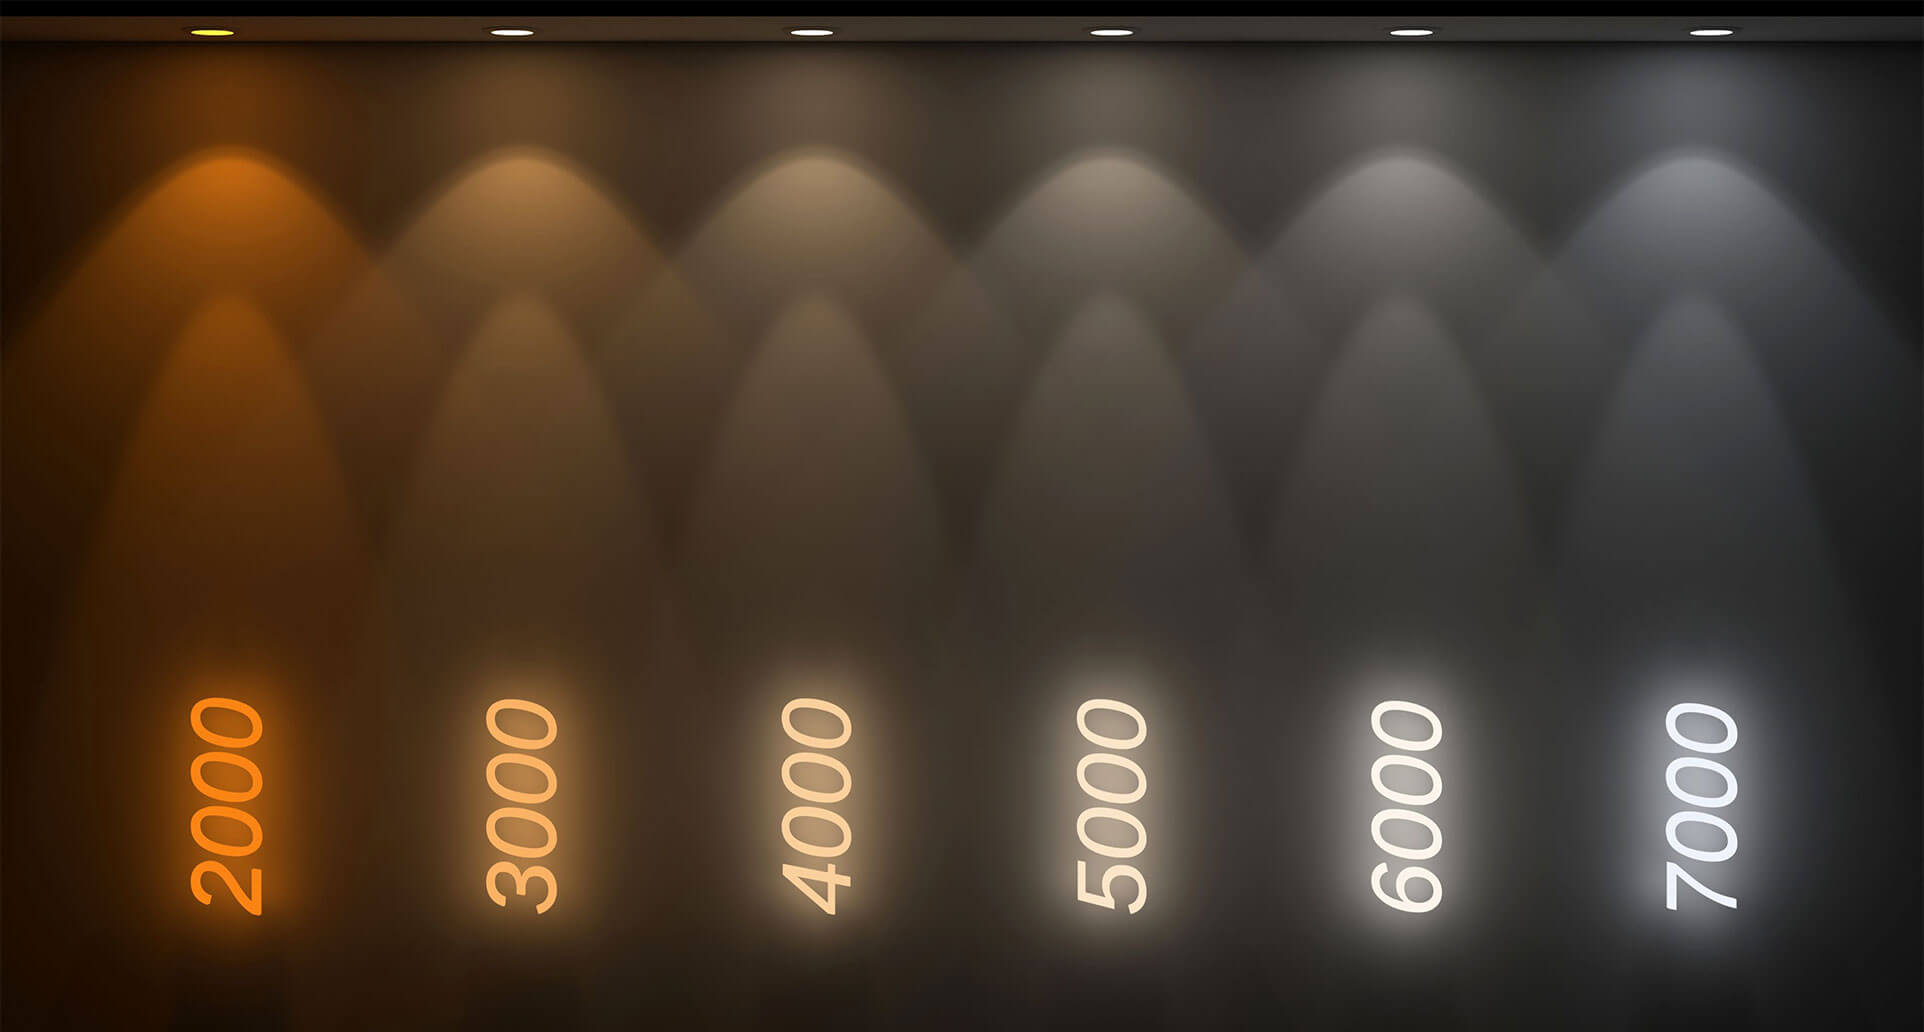
White point
The white point of a screen describes just how white a screen is and whether the white is warmer or cooler (measured in Kelvin just like light bulbs). If you are editing digital videos on an LCD screen we recommend setting a white point at 6500K whereas if you are editing for print you should set your screen to 5000K.
Gamma settings
Gamma affects brightness and color ratios — aka the contrast of colors on the screen. This setting depends on where you think the video will be viewed; if it’s going to be viewed on a screen where there is brightness all around like on a tv in a meeting room or phone you should set gamma to 2.2 whereas if you’re working on a film that will be viewed in a dark room, you should go for 2.4.
Luminance
This is how bright your screen is, which you should keep consistent throughout the process of color-correcting a video. The standard is known to be at 120.
What tools can you use for screen calibration?
Other than using the Mac and Windows integrated tools, you can also use so-called LCD test patterns and images to adjust your screen to match these — you can find some of those here.
All set to calibrate your monitor? Get to it and once you’re done check out our guide on color grading vs. color correction.
Comments
Eizo recommends between 80-100cd/m2 for most work.
You'd only use 120 in a bright room, and if it is THAT bright then yo'd be questioning if daylight is coming in (not good because it is variable), the quality of your lighting (spectral response / colour etc) and the colour of your walls - because at the illumination, they're playing a big part so you'd better be using that expensive Musell paint.
By far, 80cd/m2 in a dimmed environment is best because it lessens the effects of wall colour and ambient effects, it is approx the same luminosity of a print on art paper, and your monitor will last longer - and it better meets broadcast specs.
I've been grading and retouching images for 16+ yrs professionally and have used 80cd/m2 as my go-to brightness.